 Aion2 Guide
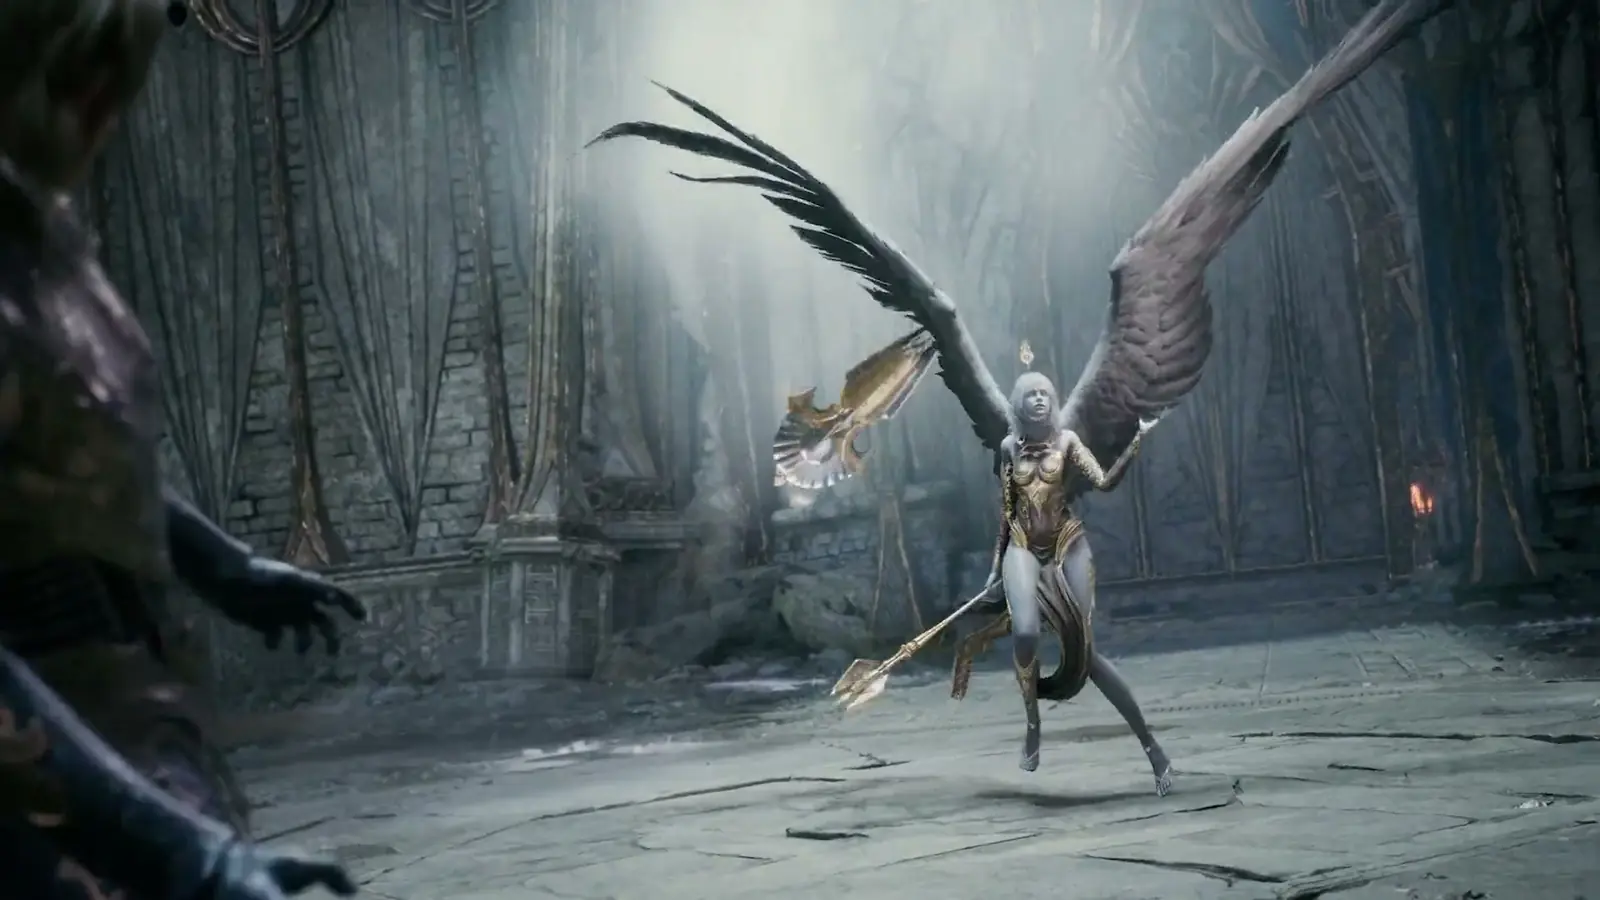
 Guía de clase · AION 2
Guía de Cleric
Sanador principal que empuña una maza y la única clase capaz de resucitar a un aliado. Cura a 40 m (Radiant Recovery, Healing Light, Light of Regeneration), potencia al grupo (Light of Protection, Earth’s Blessing) e inflige daño real a 20 m entre curaciones mediante el bucle Chain of Torment → Condemnation. Fácil de manejar, exigente en responsabilidad: en una mazmorra, si el Cleric cae, nadie puede resucitarlo.
- Rol
- Sanador
- Arma
- Mace
- Alcance
- A distancia
Guía actualizada el 13 de noviembre de 2026

De un vistazo
Puntos fuertes 5
- La única resurrección de clase del juego (Summon Resurrection, 40 m): un puesto garantizado en todos los grupos y raids.
- Curaciones instantáneas, que se pueden lanzar en movimiento y a 40 m, con purga integrada (Radiant Recovery, Absolution, Benevolence en el escalón 20).
- Gran multiplicador de grupo: Light of Protection (10,5 a 20 % de aumento de daño PvE y de tolerancia), Earth’s Blessing, Yustiel’s Power, además de los debuffs de Chain of Torment y Debilitating Mark.
- Daño real entre curaciones: sobre un objetivo afectado por Earth Punishment, Condemnation siempre es crítico y pierde su enfriamiento.
- Autosuficiente en solitario y durante la subida de nivel: ataques a 20 m, autocuraciones y curación de Radiant Benediction mientras golpeas.
Puntos débiles 5
- Fragile in melee: no dedicated dodge, only Defiance (60 s) and Salvation (stigma).
- Cannot raise itself on the global version: its death often loses the fight.
- Only 4 stigma slots at the global launch to cover healing, damage and resurrection: every content forces a choice.
- Weak in duels against burst melee classes (Gladiator, Assassin, Templar) and kiters (Ranger), according to Korean players.
- Demanding damage loop: Condemnation needs Chain of Torment on the target, and keeping it up requires a lot of cooldown reduction.
Mecánicas que conocer Texto disponible solo en inglés.
- ›Basic attack: Earth’s Retribution (left click, 20 m) restores 110 MP; its follow-ups Thunder and Lightning (110 MP) and Discharge (150 MP, random trigger) make it your mana source.
- ›Damage loop: Chain of Torment (20 s) marks the target and Condemnation (3 s) can only hit a marked target. Condemnation’s level-12 spec resets its cooldown on a crit; Earth Punishment (tier 5) makes its hits critical, so Condemnation loses its cooldown.
- ›Judgment Thunder (right click, no cooldown) triggers Divine Punishment; the level-16 spec adds one activation.
- ›Heals: Healing Light (6 s, 1 cast, 3 with the spec) targets you and the lowest ally; Radiant Recovery (12 s) heals and cleanses the party within 40 m; Light of Regeneration heals the party for 30 s on a 30 s cooldown.
- ›Heals cannot crit; Healing Enhancement turns part of your Attack into Heal Boost: Attack raises both your heals and your damage.
- ›Light of Protection is a toggle (5 s cooldown) to keep on; it does not stack with the Chanter’s Undefeated Mantra (the higher level applies, the Chanter’s on a tie).
- ›Earth Punishment grants the party Earth’s Blessing (tier 10: Double Chance; tier 15: Attack and Defense); it is not received while the Chanter’s Power of the Storm is active (global client tooltip).
- ›Noble Aura (stigma) lasts 300 s and attacks every 2 s (1 s at tier 20); it disappears when you die.
- ›Lightning Strike Scattershot only targets a staggered enemy: charged Bolt (20 to 35 stagger), Power Burst (50), Earth Punishment (20) and Root (15) fill the gauge.
- ›Defiance removes Stun, Knockdown, Airborne, Grab, Frost and Fear, then grants 5 s of Tenacity; its 60 s cooldown is not affected by cooldown reduction.
- ›Progression (global client): at most one skill level every 3 character levels; specializations at 8, 12 and 16 (third slot at level 20); Earth’s Grace (21), Survival Willpower (23) and Radiant Benediction (25) can be raised to 10 as soon as they are learned.
- ›Stigmas at level 22, 4 slots on the global version, level 20 cap: 75 shards per stigma (1, 2, 4 then 8 per level), tiers at 5, 10, 15 and 20.
Lo que juegan los mejores
Builds recomendados12
Un build por actividad: habilidades clave, Stigmas, estadísticas que priorizar y consejos, con una puntuación de confianza para cada recomendación.
Subida de nivel 1–45: atacante autosuficiente, primero el daño
Subes de nivel golpeando: Earth’s Retribution y Judgment Thunder al máximo y, desde el nivel 8, el bucle Chain of Torment → Condemnation. Las curaciones solo te mantienen con vida entre grupos de monstruos, y Radiant Benediction (25) cura mientras atacas.
Habilidades clave
Stigmas
Estadísticas que priorizar Texto disponible solo en francés.
- 1ATQ
- 2VIT de combat
- 3Réduction du temps de recharge
- 4PV
Consejos6
- Use Target mode (AION 1) while leveling: basic attacks keep going between skills and restore MP.
- Put Chain of Torment and Condemnation on the same hotbar line, Chain first: Condemnation only fires on a marked target.
- Don’t pull more than 4 monsters: your AoE skills hit 4 targets at most.
- Do the side quests: they give Daevanion points (boards at 12, 20, 30 and 40).
- Points run short at 45 (203 from levels, 383 with the regional quests and sealed dungeons; the Monolith no longer gives any): don’t raise everything to 10. At a fresh 45: Condemnation, Earth’s Retribution, Bolt, Divine Aura, Chain of Torment and Judgment Thunder at 10, the three heals and Debilitating Mark at 8, then Empyrean Lord’s Grace at 10 and Earth’s Grace at 4: 202 points, this build’s targets (aion2maps, Oct 2).
- At 45, reset (it is free) your points and Stigmas for your activity’s build: dungeon healer, with or without a Chanter, offensive as a second Cleric, solo farming; keep each set on its own preset, each has its own macro.
Farmeo en solitario en el 45: daño y autosuficiencia
En solitario, el Cleric se convierte en un lanzador resistente: Light of Protection sobre ti (+daño, +tolerancia), Earth Punishment para lanzar Condemnation de forma crítica y sin enfriamiento, Noble Aura y Prayer of Amplification para la ráfaga, y Radiant Benediction para curarte mientras golpeas.
Habilidades clave
Stigmas
Estadísticas que priorizar Texto disponible solo en francés.
- 1ATQ
- 2VIT de combat
- 3Réduction du temps de recharge
- 4Coup puissant, Boost de DGT (d’arme)
- 5Précision
- 6PV
Consejos3
- Elige en Divine Aura la especialización “Pasa a ser una habilidad AoE” para los grupos de monstruos; solo golpea a enemigos a menos de 4 m del aura.
- Mantén Light of Regeneration en la macro: 30 s de curación con un enfriamiento de 30 s.
- Vuelve a lanzar Noble Aura tras cada muerte o teletransporte.
Mazmorra de 5 jugadores: sanador principal (sin Chanter)
The set of the best Clerics on Global: Light of Protection for the party, Earth Punishment and Noble Aura for damage, and Summon Resurrection, which 64% of them equip; Prayer of Amplification takes its place once the party stops dying. You heal with Light of Regeneration, Radiant Recovery and Healing Light, and hit whenever the party’s health allows.
Habilidades clave
Stigmas
Estadísticas que priorizar Texto disponible solo en francés.
- 1ATQ (Puissance, ATQ %)
- 2Réduction du temps de recharge
- 3VIT de combat
- 4PV et Tolérance aux DGT
- 5Précision
- 6Coup puissant, Boost de DGT (d’arme)
Consejos7
- Stay 20–25 m from the boss: your attacks reach 20 m and your heals 40 m.
- Don’t die: no other class can resurrect, and you cannot raise yourself on the global version.
- If a Chanter joins, switch to the “with a Chanter” build: Light of Protection and Undefeated Mantra do not stack.
- Recast Noble Aura after every death or teleport: it disappears with you.
- In easy expeditions (Krao Cave, Draupnir), healing is light: hit more (MMO Codex).
- Chest contribution: 5% of the final boss's HP in damage, or 20% of the party's damage healed according to GamersTogether (Aug 15); Kaeria (Oct 3) warns that a Cleric who only heals can leave with nothing: hit as soon as the party is stable.
- Endgame: weapon and guard to +10 first, then bracelets; armor and jewelry at +5 are enough early on. The best global Clerics have the weapon at +10 for 63%, the guard at +10 for 56%, bracelets at +7 on average, armor and jewelry around +4 to +5 (MetaBot.GG, Oct 2).
Mazmorra de 5 jugadores con un Chanter: sanador sin Light of Protection
With a Chanter, Light of Protection overlaps with their Undefeated Mantra: replace it with Absolution, an emergency heal that removes every debuff at tier 10. Recast Earth Punishment right after their Power of the Storm, which blocks Earth’s Blessing.
Habilidades clave
Stigmas
Estadísticas que priorizar Texto disponible solo en francés.
- 1ATQ (Puissance, ATQ %)
- 2Réduction du temps de recharge
- 3VIT de combat
- 4PV et Tolérance aux DGT
- 5Précision
- 6Coup puissant, Boost de DGT (d’arme)
Consejos5
- Call out Earth Punishment to the Chanter: they can shift their Storm to the opener and stagger windows.
- Absolution only has a 90 s cooldown (60 s at tier 5): keep it for debuff waves or several allies under 30%.
- If the Chanter plays healer (no Undefeated Mantra), go back to the no-Chanter build.
- The Chanter's Earth's Promise does not apply when used together with your Chain of Torment (global client tooltip; metabot, Oct 1): keep Chain of Torment up on the boss, its effect is the one that lowers Tolerance (−5%, −15% with spec 12).
- Chest contribution: 5% of the final boss's HP in damage, or 20% of the party's damage healed according to GamersTogether (Aug 15); Kaeria (Oct 3) warns that a Cleric who only heals can leave with nothing: hit as soon as the party is stable.
Mazmorra difícil o grupo frágil: curación pura
Para progresar (Conquest, 3 estrellas, grupo con poco equipo): sin Stigmas de daño, todo para mantener en pie a la gente. Yustiel’s Power antes de los golpes fuertes, Benevolence para las fases largas, Absolution para emergencias y debuffs.
Habilidades clave
Stigmas
Estadísticas que priorizar Texto disponible solo en francés.
- 1PV et Tolérance aux DGT
- 2Réduction du temps de recharge
- 3VIT de combat
- 4ATQ et Boost de soins
- 5Précision
Consejos3
- Cast Yustiel’s Power before the big hit, never after: it reduces damage, it doesn’t heal.
- Take Healing Light’s “50% chance to remove 1 debuff” spec if cleanses are short, but rely first on Radiant Recovery and Absolution (Th3Ruthless).
- Go back to the standard healer build once the dungeon is on farm and hit enough for the required contribution (5% of the final boss's HP in damage, or 20% of the party's damage healed: GamersTogether, Aug 15; Kaeria stresses damage).
Mazmorra: Cleric ofensivo (segundo Cleric o contenido dominado)
Cuando la curación es ligera (segundo Cleric, expediciones dominadas), el Cleric se convierte en un auténtico DPS a distancia: Earth Punishment hace que Condemnation sea crítico y sin enfriamiento, Noble Aura ataca contigo y Prayer of Amplification aporta 10 s de ráfaga. Vuelve al build de sanador en cuanto el grupo tenga problemas.
Habilidades clave
Stigmas
Estadísticas que priorizar Texto disponible solo en francés.
- 1Précision
- 2VIT de combat
- 3Réduction du temps de recharge
- 4ATQ
- 5Coup puissant
- 6Boost de DGT d’arme, Boost de DGT
- 7Boost de DGT CRIT
Consejos3
- Con un Chanter, lanza Earth Punishment justo después de su Storm.
- Este build da por hecho que otro jugador cura: vuelve al build de sanador a la primera muerte.
- Prayer of Amplification también potencia tus curaciones (ataque → aumento de curación).
Raid de 10 jugadores (Ludra): sanador de grupo
Ludra se juega como dos grupos de 5 que se reparten entre dos jefes: cada grupo necesita su propio sanador. Light of Protection y Earth’s Blessing para tu grupo, Benevolence para las fases largas, Summon Resurrection para que una sola muerte no cueste la raid.
Habilidades clave
Stigmas
Estadísticas que priorizar Texto disponible solo en francés.
- 1ATQ (Puissance, ATQ %)
- 2Réduction du temps de recharge
- 3VIT de combat
- 4PV et Tolérance aux DGT
- 5Précision
- 6Coup puissant, Boost de DGT (d’arme)
Consejos4
- ⚠️ Ludra returned to Global on Nov 4, 2026 (“Abyssal Forge: Ludra” in the Nov 4 notes, “Creuset de l’Abîme : Ludra” in the French notes of Nov 11): Normal at 2,800 item level, Hard at 3,000. Since Nov 11: 2 hours per attempt (instead of 1), HP of the central Abyss fusion reactor reduced, reward group 5 guaranteed (30 → 100%) with the Rage Intent, Will and Ego materials; the Ludra Trial resets again after a wipe. Global-specific mechanics are still poorly documented: keep this build as a base.
- Ludra (Abyssal Forge) is the Global raid: 10 players in two groups of 5; at launch, 4 attempts per week including 1 final-boss kill and entry at 2,800 iLvl according to metabot (Oct 1). Since Nov 4: Normal at 2,800 and Hard at 3,000 item level (NC note), weekly limits to be confirmed. gaming.tools lists 2 resurrections per instance: check in game whether Summon Resurrection uses them.
- Position yourself to cover both sides of the boss within 40 m.
- If your group has a healing Chanter, swap Summon Resurrection for a damage stigma only if the other group keeps a resurrection.
Arena 1v1: desgaste y supervivencia
El Cleric gana un duelo por desgaste, no por ráfaga: debuffs y Condemnation constantes, curaciones entre ataques y dos respuestas a la ráfaga enemiga (Salvation, Defiance). Las clases cuerpo a cuerpo de ráfaga y las que hacen kiteo siguen siendo enfrentamientos difíciles.
Habilidades clave
Stigmas
Estadísticas que priorizar Texto disponible solo en francés.
- 1Précision
- 2Boost de DGT JcJ
- 3VIT de combat, réduction du temps de recharge
- 4PV, Tolérance aux DGT JcJ
- 5RÉS CRIT, RÉS aux altérations
- 6ATQ, DGT CRIT, Coup puissant
Consejos4
- Sigue moviéndote: la mayoría de tus hechizos se pueden lanzar en movimiento.
- Guarda Defiance (60 s, no reducible) para el control de masas que precede a una ráfaga, no para el primero que llegue.
- En el escalón 20, Salvation se activa sola bajo un estado de tipo Impacto: una segunda vida contra los aturdimientos.
- Contra un Gladiator o un Assassin, sobrevivir a la apertura importa más que tu daño.
Arena 5v5: sanador de equipo
En equipo, el Cleric gana los combates anulando la ráfaga enemiga: Yustiel’s Power antes del inicio del combate, purgas, Absolution y Salvation sobre el aliado focalizado. Sin Summon Resurrection: la arena de cooperación te da una sola vida.
Habilidades clave
Stigmas
Estadísticas que priorizar Texto disponible solo en francés.
- 1PV, Tolérance aux DGT JcJ, RÉS CRIT
- 2RÉS aux altérations
- 3VIT de combat, réduction du temps de recharge
- 4ATQ et Boost de soins
- 5Précision
Consejos3
- Mantente al alcance de curación (40 m) de todos, detrás de tu primera línea.
- Tu muerte suele decidir la partida: retrocede en cuanto dos enemigos te tomen como objetivo.
- Summon Resurrection no sirve de nada en la arena de cooperación (1 vida); resérvala para el mundo abierto.
Abyss en solitario: farmear y sobrevivir
En Lower Reshanta, el Cleric no es un cazador: farmea, sobrevive a las emboscadas y retírate hacia tu bando. Light of Protection y Yustiel’s Power absorben daño, Root inmoviliza a tus perseguidores y Salvation te da 3 s.
Habilidades clave
Stigmas
Estadísticas que priorizar Texto disponible solo en francés.
- 1PV, Tolérance aux DGT JcJ, RÉS CRIT
- 2RÉS aux altérations
- 3VIT de combat, réduction du temps de recharge
- 4ATQ et Boost de soins
- 5Précision
Consejos3
- Farmea cerca de los puntos de retirada de tu facción.
- Elige la especialización “+5 % de velocidad de movimiento” de Light of Regeneration para escapar más rápido.
- No persigas: tu daño no matará a un jugador que se cura.
Abyss en grupo: sanador del frente
En los combates de grupo, el Cleric es el ancla del equipo: Benevolence (aguante en el escalón 10), Yustiel’s Power antes de iniciar el combate, Absolution contra oleadas de debuffs y la única resurrección del campo de batalla.
Habilidades clave
Stigmas
Estadísticas que priorizar Texto disponible solo en francés.
- 1PV, Tolérance aux DGT JcJ, RÉS CRIT
- 2RÉS aux altérations
- 3VIT de combat, réduction du temps de recharge
- 4ATQ et Boost de soins
- 5Précision
Consejos3
- Tus buffs y curaciones de grupo solo afectan a tu grupo: quédate con él.
- Los Clerics son el primer objetivo del enemigo: colócate detrás de tus tanques.
- Resucita primero al tanque o al otro sanador.
Campo de batalla 10v10 (estadísticas normalizadas): sanador del objetivo
Estadísticas normalizadas: tu repertorio importa más que tu equipo. Quédate con tu grupo de 5 (los buffs son por grupo), cura a quien sostiene el objetivo y reserva Salvation para los combates alrededor del Relic Chariot.
Habilidades clave
Stigmas
Estadísticas que priorizar Texto disponible solo en francés.
- 1Normalisées
Consejos2
- Los sanadores ganan los combates por el objetivo: no te alejes en solitario.
- El modo se abre dos veces al día (11:00–14:00 y 19:00–21:00 según el cliente; zona horaria por verificar).
Habilidades38
Todas las habilidades de la clase en los servidores Global, con su nivel de aprendizaje y su enfriamiento. Haz clic en una habilidad para ver su ficha completa.
Habilidades activas 12
- Sanction de la terre · 대지의 응보
Inflige daño de Tierra a un objetivo a menos de 20 m y restaura 110 MP.
- Éclair de jugement · 심판의 번개
Selecciona un objetivo a menos de 20 m e inflige daño de Viento a un máximo de 4 enemigos a menos de 4 m del objetivo. 2 de daño al medidor de desequilibrio
- Sceau d'affaiblissement · 약화의 낙인
Selecciona un objetivo a menos de 20 m e inflige daño de Viento a un máximo de 4 enemigos a menos de 4 m del objetivo. Reduce un 5 % el aumento de daño PvE del enemigo y un 2,5 % su aumento de daño PvP, e inflige daño con el tiempo cada 1 s durante 10 s. 10 de daño al medidor de desequilibrio
- Aura sacrée · 신성한 기운
Invoca un Divine Aura cerca del lanzador que dura 5 s. El Aura es estacionaria e inflige periódicamente daño de Tierra a un objetivo seleccionado a menos de 20 m.
- Enchaînement de douleur · 고통의 연쇄
Selecciona un objetivo a menos de 20 m e inflige daño de Tierra a un máximo de 4 enemigos a menos de 4 m del objetivo. Reduce un 5 % la tolerancia al daño PvE del enemigo y un 2,5 % su tolerancia al daño PvP, e inflige daño con el tiempo cada 1 s durante 10 s. 10 de daño al medidor de desequilibrio
- Foudre déferlante · 벼락 난사
Inflige daño a un objetivo desequilibrado a menos de 20 m.
- Lumière de restauration · 재생의 빛
Restaura -HP cada 2 s durante 30 s al lanzador y a los miembros del grupo a menos de 40 m.
- Condamnation · 단죄
Selecciona un objetivo a menos de 20 m afectado por Chain of Torment e inflige daño de Tierra a un máximo de 4 enemigos a menos de 4 m del objetivo. 7 de daño al medidor de desequilibrio
- Lumière de soin · 치유의 빛
Restaura HP al lanzador y al miembro del grupo con menos HP a menos de 40 m.
- Halo de récupération · 쾌유의 광휘
Restaura HP y elimina 1 debuff del lanzador y de los miembros del grupo a menos de 40 m.
- Fulguration · 벽력
Selecciona un objetivo a menos de 20 m e inflige daño de Viento a un máximo de 4 enemigos a menos de 4 m del objetivo. Máx. 3 niveles de carga 20-35 de daño al medidor de desequilibrio
- Dissipation de choc · 충격 해제
Elimina aturdimiento, derribo, lanzamiento al aire, agarre, congelación y miedo del lanzador y otorga Tenacity durante 5 s. Tenacity: otorga inmunidad a las alteraciones de estado No se ve afectada por los efectos de reducción de enfriamiento.
Habilidades en cadena 3
- Fulmination · 뇌전
Inflige daño de Viento a un objetivo a menos de 20 m y restaura 110 MP.
- Décharge · 방전
Inflige daño de Viento a un objetivo a menos de 20 m y restaura 150 MP.
- Châtiment divin · 천벌
Selecciona un objetivo a menos de 20 m e inflige daño de Viento a un máximo de 4 enemigos a menos de 4 m del objetivo. 2 de daño al medidor de desequilibrio
Stigmas 13
- Aura noble · 고결한 기운
Invoca un Noble Aura cerca del lanzador que dura 300 s. El Aura sigue al lanzador y ataca junto con él a su objetivo. Inflige daño a un objetivo a menos de 20 m. Enfriamiento de ataque del Aura: 2 s
- Pouvoir de la vie · 생명의 권능
Otorga Benevolence al lanzador durante 20 s. Restaura HP cada 2 s al lanzador y a los miembros del grupo a menos de 40 m mientras dura.
- Entrave · 속박
Selecciona un objetivo a menos de 20 m e inflige daño de Tierra a un máximo de 4 enemigos a menos de 4 m del objetivo. Tiene un 75 % de probabilidad de inmovilizar durante 10 s. 100 % de probabilidad de inmovilizar a objetivos NPC. 15 de daño al medidor de desequilibrio
- Rédemption · 구원
El lanzador es inmune al daño y a las alteraciones de estado durante 3 s. No puede bloquear ciertos ataques muy potentes. No le afectan los efectos de aumento de enfriamiento. Los efectos de Tenaciousness, Salvation y Barrier Spell, y el efecto Unstoppable, no se pueden aplicar durante 30 s si se bloquea la acumulación de invencibilidad.
- Explosion de pouvoir · 권능 폭발
Inflige daño de Tierra a un objetivo a menos de 20 m. 50 de daño al medidor de desequilibrio
- 면죄
Elimina hasta 2 debuffs y restaura HP al lanzador y a los miembros del grupo a menos de 40 m.
- Voix de l'anéantissement · 파멸의 목소리
Selecciona un objetivo a menos de 20 m e inflige daño de Tierra a un máximo de 4 enemigos a menos de 4 m del objetivo. Inflige daño cada 1 s y reduce un 60 % la curación recibida y la recuperación por pociones de HP del enemigo durante 20 s.
- Appel de résurrection · 소환 부활
Resucita a un miembro del grupo caído a menos de 40 m del lanzador.
- Châtiment de la Terre · 대지의 징벌
Inflige daño de Tierra a un objetivo a menos de 20 m y daño cada 1 s durante 10 s. 20 de daño al medidor de desequilibrio
- Lumière de protection · 보호의 빛
Incrementa en un 10,5 % el aumento de daño PvE y la tolerancia al daño PvE, y en un 5,25 % el aumento de daño PvP y la tolerancia al daño PvP, del lanzador y de los miembros del grupo cercanos. No se acumula con el efecto de aumento de daño de la habilidad del Chanter [Undefeated Mantra] y solo se aplica el efecto de la habilidad de mayor nivel. Si ambas habilidades tienen el mismo nivel, se aplica Undefeated Mantra.
- Pouvoir de Yustiel · 유스티엘의 권능
Aumenta un 20 % la tolerancia al daño PvE y un 10 % la tolerancia al daño PvP durante 10 s del lanzador y de los miembros del grupo a menos de 40 m. No le afectan los efectos de aumento de enfriamiento.
- Prière d'amplification · 증폭의 기도
Aumenta el ataque un 20 % durante 10 s.
- Sceau d'assaut · 강습 낙인
Selecciona un objetivo a menos de 20 m e inflige daño a un máximo de 4 enemigos a menos de 4 m, con un 30 % de probabilidad de inmovilizarlos. 100 % de probabilidad de inmovilizar a objetivos NPC. Aumenta la Defensa hasta un máximo del 20 %, de forma proporcional a los objetivos golpeados.
Pasivas 10
- Faveur chaleureuse · 따뜻한 가호
Aumenta el HP máximo del lanzador en un 6 % y el MP máximo en 7.
- Faveur des Seigneurs Empyréens · 주신의 가호
Aumenta el Bloqueo del lanzador en 200 y restaura HP al bloquear. Enfriamiento: 3 s
- Grâce des Seigneurs Empyréens · 주신의 은총
Aumenta el golpe crítico del lanzador en 100 y la probabilidad de Doble en un 0,2 % e inflige daño adicional al asestar un ataque a un objetivo. Enfriamiento: 1 s
- Soins améliorés · 치유력 강화
Incrementa en un 22,4 % del ataque el aumento de curación del lanzador.
- Voile d'immortalité · 불사의 장막
Aumenta la Defensa del lanzador en un 2 % y la resistencia crítica en 100.
- Régénération obstruée · 회복 차단
Tiene un 7 % de probabilidad de reducir un 32 % la curación recibida del objetivo durante 5 s al asestar un ataque. Enfriamiento: 5 s
- Prière de concentration · 집중의 기도
Forma un escudo protector que bloquea 424 de daño e incrementa en un 20 % el aumento de curación del lanzador durante 30 s cuando el HP es del 50 % o menos. Enfriamiento: 60 s
- Grâce de la terre · 대지의 은총
Incrementa en un 10,5 % el aumento de daño crítico del lanzador y en 100 la Precisión.
- Volonté de survie · 생존 의지
Aumenta en un 17 % la resistencia a alteraciones de estado del lanzador. Aumenta la tolerancia al daño PvE en un 12 % y la tolerancia al daño PvP en un 6 % durante 5 s al sufrir aturdimiento, derribo, lanzamiento al aire, congelación o miedo. Aumenta en un 10 % la resistencia a alteraciones de estado durante 5 s al recibir un golpe mientras se sufre aturdimiento, derribo, lanzamiento al aire, congelación o miedo (hasta 10 acumulaciones). Enfriamiento del aumento de tolerancia al daño: 60 s Enfriamiento del aumento de resistencia a alteraciones de estado: 1 s
- Faveur éclatante · 찬란한 가호
Restaura HP al lanzador y a los miembros del grupo a menos de 40 m al asestar un ataque. Enfriamiento: 5 s
Rotaciones8
Las secuencias que jugar según la situación, en orden.
Apertura contra jefes de mazmorra (curación y daño)
Inicio del combate contra un jefe de expedición o de raid, con el tanque en posición y el grupo a menos de 40 m.
- 1
 Light of RegenerationCuración de grupo con el tiempo de 30 s; vuelve a lanzarla en cada enfriamiento.
- 2
 Debilitating MarkAumento de daño del jefe −15 % con la especialización 12, Defensa −15 % con la especialización 8.
- 3
 Chain of TormentTolerancia al daño del jefe −15 % (especialización 12): habilita Condemnation.
- 4
 Earth PunishmentCondemnation con crítico garantizado; Earth's Blessing para el grupo (no durante la Storm del Chanter).
- 5
 CondemnationSin enfriamiento mientras sea crítico (especialización 12).
- 6
 Divine AuraEstacionaria: colócala a 20 m del jefe.
- 7
 Judgment ThunderRelleno, luego Divine Punishment.
- 8
 Prayer of AmplificationOn the boss as soon as the party is stable: +20% Attack, heals included (Healing Enhancement).
- 9
 BenevolenceIn place of Prayer of Amplification (Pure healing, Raid, party short on healing): before the first AoE damage phase.
Bucle de daño entre curaciones (jefe, objetivo único)
Combate contra un jefe en una mazmorra o raid, con el grupo estable (HP por encima del 70 %), o contra un monstruo de élite durante el farmeo.
- 1Earth PunishmentEn cada enfriamiento (30 s, 20 s de efecto en el escalón 20).
- 2CondemnationÚsala sin parar mientras sea crítica: sin enfriamiento sobre el objetivo de Earth Punishment.
- 3Chain of TormentSolo cuando el efecto ha terminado.
- 4Debilitating MarkEn cada enfriamiento (10 s).
- 5Divine AuraEn cada enfriamiento, al alcance del jefe.
- 6
 BoltCon la carga completa: golpe fuerte y 35 de desequilibrio.
- 7
 Lightning Strike ScattershotDurante el desequilibrio: −1 s en todos tus enfriamientos por golpe (especialización 16).
- 8Judgment ThunderRelleno, activa Divine Punishment.
Golpe fuerte señalizado: proteger y curar al grupo
Ataque AoE señalizado de un jefe de mazmorra o de raid.
- 1
 Yustiel's PowerAntes del impacto: tolerancia +20 % (30 % en el escalón 20) y un escudo del 10 % del HP durante 10 s.
- 2Light of Regeneration¿Ya está activa? Si no, ahora.
- 3
 Radiant RecoveryTras el impacto: cura y purga a todo el grupo a menos de 40 m.
- 4
 Healing LightSobre los aliados con menos HP, hasta 3 lanzamientos con la especialización.
- 5
 AbsolutionSi varios aliados siguen con poco HP o cargados de debuffs.
- 6BenevolenceSi la fase de daño continúa.
Cae un aliado: resurrección en combate (mazmorra, raid)
Un miembro del grupo muere durante un combate contra un jefe de mazmorra o de raid.
- 1
 Summon ResurrectionResucita a los aliados muertos a menos de 40 m, junto a ti.
- 2Radiant RecoveryVuelve a curar a todos.
- 3Light of RegenerationCuración sostenida sobre el aliado resucitado.
- 4Healing LightSobre el aliado resucitado si sigue siendo el que tiene menos HP.
Con un Chanter: sincroniza Earth Punishment tras la Storm (mazmorra)
Mazmorra o raid con un Chanter que usa Power of the Storm.
- 1Earth PunishmentJusto después de que termine la Storm: Earth's Blessing no se recibe mientras esta está activa.
- 2CondemnationCríticos garantizados sobre el objetivo.
- 3Judgment ThunderRelleno.
Subida de nivel y farmeo: grupo de monstruos
Grupo de 2 a 4 monstruos durante la subida de nivel o el farmeo en solitario.
- 1Debilitating MarkGolpea a 4 enemigos a menos de 4 m del objetivo.
- 2Chain of TormentMarca al grupo de monstruos: habilita Condemnation.
- 3Condemnation4 objetivos a menos de 4 m.
- 4Divine AuraEspecialización AoE: golpea a los monstruos a menos de 4 m del aura.
- 5Judgment ThunderAoE, sin enfriamiento.
- 6
 Earth's RetributionClic izquierdo para el MP.
Duelo en la arena 1v1 (PvP, desgaste)
Arena of Solitude o un duelo contra un jugador en el Abyss, con tu propio equipo.
- 1Debilitating MarkEspecialización 8: Defensa −15 % o 20 % de probabilidad de aturdir.
- 2Chain of TormentHabilita Condemnation; especialización de 20 % de derribo.
- 3Earth PunishmentCondemnation con crítico garantizado.
- 4CondemnationPresión constante.
- 5Light of RegenerationCuración sostenida mientras te mueves.
- 6Healing LightEntre ataques.
- 7
 SalvationDurante su ráfaga, no antes.
- 8
 DefiancePara el control que precede a su ráfaga.
Arena 5v5, Abyss y campo de batalla: curación en PvP de equipo
Combate de equipo en la Arena of Cooperation, en el Abyss o en el campo de batalla.
- 1Yustiel's PowerAntes de que el enemigo inicie el combate, nunca después.
- 2Light of RegenerationSiempre activa.
- 3Radiant RecoveryCuración de grupo y purga.
- 4Healing LightSobre el objetivo focalizado.
- 5AbsolutionOleada de debuffs o varios aliados con poco HP.
- 6SalvationSi te focalizan; escalón 15: también el aliado con menos HP.
- 7Chain of TormentSobre el objetivo de tu equipo entre curaciones.
- 8Debilitating MarkReduce el daño del objetivo enemigo.
Subida de nivel 1 → 45Texto disponible solo en inglés.
Qué habilidades subir en cada tramo de nivel y consejos para progresar rápido.
Niveles 1 a 8
Level Earth's Retribution (left click, restores 110 MP a hit) and Judgment Thunder (right click) to the maximum allowed at each threshold (a skill gains at most 1 level every 3 character levels), then Divine Aura (3). Chain of Torment (4) and Condemnation (8) form the damage loop: put them on the same macro line, Chain first. On Global, points run short until about level 30: Debilitating Mark, Lightning Strike Scattershot and Light of Regeneration wait (aion2maps, computed from the global client). Macro from level 4: a Chain of Torment, Debilitating Mark, Condemnation (8), Judgment Thunder stack, left click held (see Macros).
Niveles 9 a 18
Keep both clicks maxed, then Chain of Torment, Condemnation and Divine Aura; Debilitating Mark goes up from 11 and Bolt (14) as soon as you learn it. Damage first: aion2maps leaves Healing Light (10) and Radiant Recovery (12) at level 1 until 34; Couga54 raises Healing Light a little for yourself (“a healing-focused Cleric levels slowly”). Nezekan Daevanion board at level 12. At level 10, move to two lines: Condemnation and Chain; Divine Aura, Mark, Light of Regeneration and Judgment Thunder (aion2maps).
Niveles 19 a 25
First specializations at 19: Earth's Retribution “+20% MP restored” and Judgment Thunder “Deals up to 12% more damage when fewer targets are hit” (“-20% MP consumed” if MP runs short) reach 8; Divine Aura 8 at 21, Chain of Torment 8 at 22, Debilitating Mark 8 at 24 (“-15% target Defense”). Earth's Grace (21) has no level gate: Couga54 raises it to 10 right away, aion2maps keeps those points for the actives until 45. Stigmas at level 22: see the leveling build. Zikel board at level 20. Stigmas: 1st slot at 22 (after the Ascension quest), Light of Protection, a toggle to keep out of the macro.
Niveles 26 a 38
Condemnation 8 at 26 (“Deals up to 12% more damage when fewer targets are hit”), Earth's Retribution 10 at 30, Judgment Thunder 10 at 31, Condemnation 10 and Bolt 8 at 32 (“+30% Skill Speed”), Divine Aura 10 at 33, Chain of Torment 10 at 34, Bolt 10 at 38. Heals go up from 34: Healing Light and Radiant Recovery to 8 at 39 (aion2maps). If you heal groups along the way, bring Healing Light forward: Kaeria wants it at 16 before group dungeons (with Daevanion and gear). Vaizel board at level 30. Stigmas: Earth Punishment at 27, no. 1 of the damage line (critical, cooldown-free Condemnation on its target), Noble Aura at 32 (recast every 5 min), Prayer of Amplification at 37; Summon Resurrection in a dungeon preset (aion2maps, global players).
Niveles 39 a 45
Healing Light and Radiant Recovery 8 at 39, Light of Regeneration 8 at 42 (“+20% amount healed when HP is 50% or less”), then Empyrean Lord's Grace 10 at 45 and Earth's Grace 4: 202 of the 203 points (aion2maps). The 180 points from Wisdom Stones (regional quests, sealed dungeons) finish aion2maps’ order: Earth's Grace, the heals and Debilitating Mark to 10, Healing Enhancement, Warm Benediction, Lightning Strike Scattershot, Immortal Veil then Radiant Benediction, and Defiance (378 points). Triniel board at level 40, Azphel (PvP) at 45. At 45, prepare the group build: Condemnation, Radiant Recovery and Healing Light around 16–20 via Daevanion, rings and Arcana. At 45, reset points and Stigmas for free for your activity’s build (dungeon healer with or without a Chanter, offensive, farming). Endgame, from the best global Clerics (MetaBot.GG, Oct 2): weapon and guard to +10 first, bracelets next, armor and jewelry at +5; on the boards, Nezekan’s Light of Regeneration, Condemnation, Judgment Thunder and Empyrean Lord's Grace nodes and Zikel’s Earth's Retribution and Judgment Thunder nodes (90 to 98% of them); Stigma shards: Earth Punishment toward 20, then Light of Protection (aion2maps). Lucia (106,000 combat power, Oct 5) skips Krao Cave for Draupnir, then the Abyss for Stigma shards and Daevanion crystals, then Urugugu and Vakron; her rings carry Condemnation, Radiant Recovery and Judgment Thunder levels.
Niveles 46 a 50
Korea only (maximum level 55 since Nov 11, 50 before): levelling 1–45 plays as on Global, then each level gives 1 advanced Stigma shard (1 more when a Stigma reaches 20). The 5th Stigma slot is already open, the 6th opens at 50; raise Earth Punishment and Light of Protection (or Prayer of Amplification) toward 25 first, like the best Korean Clerics (NotMeter, aion2tool). Skills: Condemnation, Earth's Retribution, Bolt and Divine Aura toward 20 (빵호빵; 100% of the top 20, NotMeter), the heals toward 16; passives: Earth's Grace then Empyrean Lord's Grace; level-45 boards after the skill nodes of the first four.
Consejos de subida de nivel
- ›Target mode (AION 1) while leveling: the basic attack keeps going between two skills and restores MP (MMO Codex).
- ›A single hotbar row is enough until level 10: Chain of Torment, Debilitating Mark, Condemnation, Judgment Thunder (Couga54).
- ›Budget at 45 on Global: 203 points from levels, 383 with the regional quests (58) and the sealed dungeons (2 each, 61 dungeons); the Monolith no longer gives points (global client; aion2maps, AION2 Hub). “Fresh 45” split above: 202 points, aion2maps’ split (computed from the global client): the six damage skills at 10, the three heals and Debilitating Mark at 8, Empyrean Lord’s Grace at 10 and Earth’s Grace at 4. The 91 global Clerics tracked by aion2tool (Oct 4) raise Earth’s Retribution, Judgment Thunder and Condemnation first; Bolt is the least raised of their ten main skills. Healer of a party short on healing: Healing Light and Radiant Recovery at 10, Bolt and Divine Aura at 8 (same cost). The former split (256 points) followed the Korean budget.
- ›Do the side quests: they award Daevanion points (boards at 12, 20, 30 and 40).
- ›Equip Summon Resurrection from 22 for the leveling dungeons: resurrection stones are scarce early on (aLuckyRO).
PvPTexto disponible solo en inglés.
El papel de la clase en PvP y cómo enfrentarse a cada rival.
A group healer above all: excellent in 5v5 and in group Abyss (heals, cleanses, Salvation, resurrection outside the arena), weak in duels. In 1v1, it wins by attrition (debuffs, Condemnation, heals) but struggles against burst melee classes and kiters (Korean opinions, December 2025 to April 2026). In Korea, the healing-received penalty in the Abyss and the arena went from 30% to 20% on Aug 12.
Contra cada clase 8
 TemplarPeligro
- Pueden contrarrestarlo todo: atracción, aturdimientos y bloqueos (DC Inside, diciembre de 2025).
- Mantente fuera del alcance de su atracción; guarda Defiance para el aturdimiento que precede a su ráfaga.
- Voice of Doom (−60 % de curación, escudos eliminados en el escalón 10) contra sus curaciones y escudos.
 GladiatorPeligro
- “Desastre natural” para los Clerics coreanos: nunca te quedes al alcance de sus acercamientos.
- Root en cuanto se acerquen (75 %, 100 % en el escalón 15) y luego retrocede hasta 20 m.
- Salvation contra su Rage Burst, Defiance contra sus derribos.
 AssassinPeligro
- Su apertura desde el sigilo puede matarte en 1 o 2 s (Inven): guarda Salvation y Defiance para ella.
- Sobrevive a la apertura y luego usa Root y curaciones: con el tiempo, la ventaja vuelve al Cleric.
- Yustiel's Power (escudo del 10 %) antes de entrar en una zona peligrosa.
 RangerPeligro
- “Imposible de vencer” para un Cleric coreano (DC Inside, diciembre de 2025): te hacen kiteo a distancia.
- Pégate a los obstáculos y fuerza el combate a menos de 20 m.
- Purga sus ralentizaciones e inmovilizaciones con Radiant Recovery.
 SorcererPeligro
- Es cuestión de sincronización: Salvation antes de su transformación o de su gran hechizo (DC Inside).
- Defiance elimina la congelación y el miedo.
 SpiritmasterPeligro
- Construidos en torno a la evasión, son muy difíciles de matar (DC Inside, diciembre de 2025): las especializaciones “Ignora el Bloqueo y la Evasión” de Chain of Torment y Debilitating Mark ayudan.
- Defiance contra su miedo; purga su Corrosion (−70 % de curación).
- ClericPeligro
- Enfrentamiento entre iguales: combate de desgaste; Voice of Doom (−60 % de curación y de pociones) suele decidirlo.
- Guarda Salvation para después de la suya.
 ChanterPeligro
- Los dos bandos coreanos coinciden: el Cleric está en desventaja (críticos garantizados, purga de tus debuffs, el aguante del Chanter; Inven 26407).
- Voice of Doom contra su curación; no malgastes Defiance en su primer aturdimiento.
Consejos de PvP
- ›Configuración de habilidades aparte para PvP (Stigmas y macro distintos).
- ›Defiance (60 s, no se puede reducir): resérvala para el control que precede a una ráfaga, no para el primero que llegue.
- ›Salvation (3 s de inmunidad, 150 s): en el escalón 15 también protege al aliado con menos HP; en el escalón 20 se activa sola bajo un estado de tipo Impacto.
- ›Survival Willpower (23, subida a 10 de inmediato): resistencia a alteraciones de estado +17 %, la pasiva de PvP prioritaria.
- ›En la Arena of Cooperation (1 vida), Summon Resurrection no sirve de nada: lleva Salvation o Absolution.
- ›Voice of Doom (−60 % de curación y de pociones durante 20 s) contra sanadores y clases que se curan a sí mismas.
En grupoTexto disponible solo en inglés.
Lo que la clase aporta a un grupo y las combinaciones que funcionan.
Lo que aporta 7
- The only class resurrection: Summon Resurrection revives dead allies within 40 m (120 s cooldown; tier 10: 3 s of invincibility).
- Party heals within 40 m with cleansing: Radiant Recovery (12 s), Light of Regeneration (30 s heal over time, Tolerance +5% with spec 16), Benevolence, Absolution (cleanses everything at tier 10).
- Light of Protection: PvE Damage Boost and Tolerance of 10.5% (up to 20% at level 20) for the party, Max HP +10% at tier 15; does not stack with Undefeated Mantra.
- Earth's Blessing (Earth Punishment): Double +5% (tier 10), then Attack and Defense +5% (tier 15) for the party for 10 s (20 s at tier 20); blocked by Power of the Storm.
- Boss debuffs: Chain of Torment (PvE Damage Tolerance −5%, −15% with spec 12) and Debilitating Mark (PvE Damage Boost −5%, −15% with spec 12; Defense −15% with spec 8).
- Yustiel's Power: PvE Damage Tolerance +20% (30% at tier 20) and a shield of 10% HP for 10 s for the party.
- Stagger: Bolt 20 to 35, Power Burst 50, Earth Punishment 20, Root 15.
Lo que necesita del grupo 4
- A Templar who holds the boss: you heal and hit from 20–40 m.
- A Chanter for their Sprint Mantra (speed and stamina; Global only: in Korea it was removed on Nov 11 and replaced by “폭풍의 주문”, which raises the Chanter’s boss damage) and their Healing Touch as backup; coordinate Light of Protection ↔ Undefeated Mantra and Earth Punishment ↔ Power of the Storm.
- Allies within 40 m: all your party heals have that range.
- Someone to protect you: without you, no more resurrection.
Combinaciones 6
- Chanter
“호치” duo: the Chanter buffs and hits, you heal. Light of Protection and Undefeated Mantra do not stack; Earth's Blessing is not received during Power of the Storm: recast Earth Punishment right after. Ask them for Sprint Mantra (Global; in Korea it was removed on Nov 11 and replaced by “폭풍의 주문”, which raises the Chanter’s boss damage). Their Earth's Promise does not apply when used together with your Chain of Torment (global client tooltip).
- Templar
Aguantan al jefe y reciben los golpes fuertes: Healing Light siempre se dirige al aliado con menos HP; reserva Radiant Recovery para sus debuffs.
- Gladiator
Cuerpo a cuerpo resistente (con absorciones) que golpea de frente, junto al tanque: Light of Regeneration y Radiant Recovery cubren a ambos.
- Assassin
Ráfaga frágil: reserva Healing Light para ellos tras sus aperturas; Earth's Blessing (Doble) beneficia a su ráfaga.
- Sorcerer
Bahamut (TW, noviembre de 2025) empareja al Sorcerer con el Cleric en la mejor composición de 4 jugadores; colócate entre los cuerpo a cuerpo y ellos para cubrir a todos a menos de 40 m.
- Ranger
DPS a distancia: colócate entre los cuerpo a cuerpo y ellos; tus 40 m cubren a ambos.
Errores frecuentes16Texto disponible solo en inglés.
Los errores que más cuestan, recopilados de guías y jugadores.
- 1Putting Light of Protection in the macro: it is a toggle, the loop switches it off.
- 2Casting Condemnation without Chain of Torment on the target: it won't fire.
- 3Casting Earth Punishment during Power of the Storm: Earth's Blessing is not received.
- 4Keeping Light of Protection with a Chanter without coordinating: one of the two buffs is lost.
- 5Forgetting to recast Noble Aura after a death or a teleport.
- 6Dying: nobody else can resurrect, and the global version has no self-resurrection.
- 7Using Lightning Strike Scattershot outside stagger: it only fires on a staggered target.
- 8Stacking Critical Hit to heal: heals don't crit.
- 9Copying a Korean set with 5–6 stigmas or a Daevanion order with 8 boards: the global version has 4 slots and 6 boards since Oct 21 (Ariel included, without Marchutan or Yustiel).
- 10Raising every skill to 10 while leveling: each costs 21 points and you only have 203 at 45 (383 with the regional quests and sealed dungeons).
- 11Wasting Absolution on a minor wound (90 s cooldown).
- 12Casting Yustiel's Power after the big hit: it reduces incoming damage, it doesn't heal.
- 13Taking Summon Resurrection in the Arena of Cooperation (1 life).
- 14Using external mouse macros: penalized in Korea, risky on the global servers.
- 15Staying in melee with the boss: your attacks reach 20 m and your heals 40 m.
- 16Following a guide older than Apr 22 (Korea): healing, Light of Protection and Noble Aura were reworked.
Fuentes
Cada recomendación cita su fuente y su fecha.
- NC, note de mise à jour KR du 13/11/2026 (aucun changement du Clerc)Oficial13/11/2026Oficial
- NC, note de mise à jour KR du 11/11/2026 (refonte du Clerc, niveau 55, plateau Lumiel, stats divines, Arène de coopération en 2 contre 2)Oficial11/11/2026Oficial
- NC, notes de version Global du 11/11/2026 (Ludra en 2 h, palier 3 du mode Difficile à 2 800, Fragments d’Ariel)Oficial11/11/2026Oficial
- NC, notes de mise à jour Global du 04/11/2026 (Forge abyssale : Ludra, Reshanta extérieur du chaos, siège)Oficial04/11/2026Oficial
- NC, note de mise à jour KR du 04/11/2026Oficial04/11/2026Oficial
- NC, notes de mise à jour Global du 28/10/2026 (PV de base, boss, Assassin)Oficial28/10/2026Oficial
- NC, note de mise à jour KR du 28/10/2026 (Outland)Oficial28/10/2026Oficial
- NC, notes de mise à jour Global du 21/10/2026 (mode Difficile, plateau Ariel, correctifs de classes)Oficial21/10/2026Oficial
- NC, note de mise à jour KR du 21/10/2026 (compétences d’assaut, réductions de soins, fin de saison au 11/11)Oficial21/10/2026Oficial
- NC, notes de mise à jour Global du 14/10/2026 (correctifs de classes)Oficial14/10/2026Oficial
- NC, note de mise à jour KR du 14/10/2026 (rééquilibrage RvR)Oficial14/10/2026Oficial
- NC, note de mise à jour KR du 07/10/2026Oficial07/10/2026Oficial
- NCSOFT — CDN officiel des ressources du jeu (icônes des compétences)Oficial02/10/2026Oficial
- NCSOFT — gameinfo/pcdata (noms officiels des classes en FR et EN)Oficial02/10/2026Oficial
- NC – guide officiel KR, compétences du Clerc (치유성 스킬)Oficial30/09/2026Oficial
- Client global AION 2 (infobulles FR/EN, tables d’apprentissage et de spécialisations ; extraction du 28/09/2026)Oficial28/09/2026Oficial
- NC — guide officiel KR, présentation de la classe (치유성, arme)Oficial17/11/2025Oficial
- NotMeter – « 직업별 세팅 가이드 » (20 meilleurs Clercs coréens, journaux de combat, 05/10)Prensa05/10/2026Contrastado
- aion2tool (아툴) – statistiques du Clerc coréen : 200 meilleurs classés (stigmas, Arcanes), mises à jour du 01 au 04/10/2026 (KR)Prensa04/10/2026Contrastado
- aion2tool (아툴) – statistiques globales du Clerc : niveaux moyens des compétences, passifs et stigmas de 91 Clercs des serveurs globaux (04/10)Prensa04/10/2026Contrastado
- Dossier interne research/macros.md (système de macro officiel KR, 27/05/2026)02/10/2026Contrastado
- MetaBot.GG – « Cleric Build Planner » (151 des 1 560 meilleurs Clercs de niveau 45 des serveurs globaux, fiches officielles, 02/10)Prensa02/10/2026Contrastado
- Th3Ruthless – « AION 2 Cleric Guide » (version globale, 4 stigmas : 1v1, 5v5, donjon soin, donjon dégâts)Guía o creador24/09/2026Contrastado
- Inven 치유성 – 빵호빵, « 그저 한없이 사랑합니다, 9/24 PVE 최적화 가이드 » (인증, KR)Comunidad24/09/2026Contrastado
- NC (trad. AION2 Hub) – note de mise à jour KR du 23/09/2026 (Puissance du champ de bataille)Oficial23/09/2026Contrastado
- NC (trad. AION2 Hub) – note de mise à jour KR du 16/09/2026Oficial16/09/2026Contrastado
- NC (trad. AION2 Hub) – note de mise à jour KR du 09/09/2026Oficial09/09/2026Contrastado
- NC (trad. AION2 Hub) – note de mise à jour KR du 04/09/2026Oficial04/09/2026Contrastado
- NC (trad. AION2 Hub) – note de mise à jour KR du 26/08/2026Oficial26/08/2026Contrastado
- NC (trad. AION2 Hub) – note de mise à jour KR du 12/08/2026 (soins à 40 m)Oficial12/08/2026Contrastado
- NC (trad. AION2 Hub) – note de mise à jour KR du 01/07/2026Oficial01/07/2026Contrastado
- Inven – résumé du live du 26/05 (mise à jour KR du 27/05/2026, Clerc)Oficial27/05/2026Contrastado
- Inven 치유성 – Sotimeri, « 4/22 패치 이후 치유성 PVE 가이드글 » (KR)Comunidad02/05/2026Contrastado
- NC (trad. AION2 Hub) – note de mise à jour KR du 22/04/2026 (refonte des soins, Aura noble)Oficial22/04/2026Contrastado
- Inven 치유성 – Sotimeri, « 치유성 PVE 종합 가이드글 » (KR)Comunidad16/04/2026Contrastado
- Inven – résumé du live du 31/03 (Saison 3, soin de classe du Clerc, appliqué le 01/04/2026, KR)Oficial31/03/2026Contrastado
- Aion 2 Maps – « Cleric » : build, macro et dépannage, soins, ordre des stigmas au leveling (05/10)Guía o creador05/10/2026Fuente única
- BoredAF – « AION 2: Cleric Macro Guide - 2 Button Gameplay » (YouTube, 05/10, transcription lue)Guía o creador05/10/2026Fuente única
- Aion 2 Meta – « Cleric Build Guide » : stigmas, niveaux de compétences, équipement et Arcanes des 52 meilleurs Clercs de niveau 45 des serveurs globaux (fiches officielles NC, 04/10) et de 10 281 Clercs coréens classés (données AION2CAL, 01/10)Guía o creador04/10/2026Fuente única
- aLuckyRO – « AION 2 Latest Cleric PvE Macro Setup for Global » (YouTube, 04/10, transcription lue)Guía o creador04/10/2026Fuente única
- Lucia – « Aion 2 Cleric Guide from a Worlds 1st Rank 1 » (YouTube, 04/10, transcription lue)Guía o creador04/10/2026Fuente única
- AION 2 Guides (Couga54) – « Cleric » (mode JcE d’après le guide vidéo de Kaeria, joueuse de Clerc sur le client taïwanais, adapté à la Saison 1 globale ; mis à jour le 03/10 : leveling, 4 stigmas, macro à 3 lignes, Arcanes)Guía o creador03/10/2026Fuente única
- Aion 2 Maps – « Cleric » (guide Global : données du client et conseils de créateurs ; mis à jour le 02/10)Guía o creador02/10/2026Fuente única
- Aion 2 Maps – « Pantheon stats » (Sagesse = Coup puissant, 0,1 % par point au Global ; 02/10)Guía o creador02/10/2026Fuente única
- Game8 – « Best Builds », build « Absolution Cleric » (JcE, palier 2 100 : Absolution, Pouvoir de la vie, Appel de résurrection, Lumière de protection, Pouvoir de Yustiel ; 02/10)Guía o creador02/10/2026Fuente única
- aLuckyRO – « AION 2 Latest Cleric PVE Build for Global » (YouTube, 02/10, transcription lue)Guía o creador02/10/2026Fuente única
- metabot.gg – « AION 2 Gear Progression Guide: Item Level and Best Gear » (Saison 1 globale)Guía o creador01/10/2026Fuente única
- metabot.gg – « AION 2 Dungeons: Full List, Unlock Levels and Entry Limits » (Saison 1 globale)Guía o creador01/10/2026Fuente única
- Aion 2 Maps – « What’s different on Global » (client global : points de compétence, stigmas, Daevanion, Arcanes ; 01/10)Guía o creador01/10/2026Fuente única
- Game8 – « List of All Parchment Arcana » (sets Vigueur primordiale et Armure magique)Guía o creador30/09/2026Fuente única
- Mein-MMO – « Arkana, Daevanion & Pet » (Saison 1 globale : 4 emplacements d’Arcanes)Prensa29/09/2026Fuente única
- Iruminati – « Guide Cleric Aion 2 : build PvE complet » (7mmo, FR)Guía o creador28/09/2026Fuente única
- Aion 2 Maps – « Stat lines » et « Manastones and Theostones » (lignes possibles par pièce, tirée du client global ; 28/09)Guía o creador28/09/2026Fuente única
- gaming.tools – activités du client global (arènes, Ludra, expéditions)Base de datos26/09/2026Fuente única
- Th3Ruthless – « The ONLY AION 2 Cleric Guide You’ll Ever Need! » (YouTube, 24/09, transcription lue)Guía o creador24/09/2026Fuente única
- MMO Codex – « Aion 2 Cleric Guide » (cite aLuckyRO, MrRosaPony, Kang Coding, Kim Dark, Society Of Gaming, wetherow)Guía o creador21/09/2026Fuente única
- MMO Herald – « Cleric guide: stats, gearing and wings » (valeurs du client KR/TW)Guía o creador20/09/2026Fuente única
- note.com – retour du test de charge global (LST, 17–18/09) : 4 emplacements de stigmaComunidad19/09/2026Fuente única
- AION2 Hub – « AION 2 Global vs Korea: What the Launch Scale Test Build Changed » (test de charge du 17/09)Prensa17/09/2026Fuente única
- Inven (astuces, KR) – 빵호빵, compétence de déséquilibre tenue pendant le groggy (24/08)Guía o creador24/08/2026Fuente única
- GamersTogether – « AION 2 Dungeons: Types and Difficulties » (règle de contribution aux coffres, vérifiée au 15/08/2026)Guía o creador15/08/2026Fuente única
- Inven 치유성 – Sotimeri, macro du jeu et réservation de compétence (KR)Comunidad29/05/2026Fuente única
- Inven 치유성 – « 치유 스티그마 질문 많아서 딱 정리해준다 » (sets par contenu, 5 emplacements, KR)Comunidad22/04/2026Fuente única
- Inven 치유성 – « 505K++ 치유성 PVE(원정, 초월, 성역) 세팅 가이드 » (KR)Comunidad31/03/2026Fuente única
- Inven Global – 2e clear coréen de Ludra (2 Clercs ; « le soigneur ne doit pas mourir »)Prensa30/12/2025Fuente única
- Vortex Gaming – statistiques des 100 meilleurs Clercs KR (spécialisations, stigmas)ComunidadFuente única
- Vortex Gaming – « Aion 2 Cleric PVE/PVP Skill Tree and Stigma » (KR)ComunidadFuente única
- AION2 Codex – « Cleric PvE build » (client global ; transcription d’un guide vidéo de la communauté, mise à jour du 03/10)Guía o creador03/10/2026Deducción
- Fextralife AION 2 Wiki – « Cleric Builds » (version globale uniquement, mise à jour du 02/10)02/10/2026Deducción
- KeenGamer – « AION 2 Best Class Tier List: PvE, PvP & Solo » (lancement global)Prensa02/10/2026Deducción
- AOEAH – « AION 2 Global Best Builds & Skills For Each Class » (site commercial)Guía o creador01/10/2026Deducción
- metabot.gg – « AION 2 Builds: Best Build for Every Class at Launch » (client global 2.0.3.0, analyse sans statistiques de joueurs)Guía o creador01/10/2026Deducción
- metabot.gg – tier list des classes (analyse du client global 2.0.3.0)Guía o creador01/10/2026Deducción
- OSLink – « AION 2 Cleric Build Guide and Best Builds » (guide généraliste)Guía o creador01/10/2026Deducción
- AION 2 Guide (aion2game.com) – « AION 2 Cleric Guide: Best PvE Build » (Saison 1 globale)Guía o creador30/09/2026Deducción
- Destructoid – « Aion 2 class tier list (Global) »Prensa30/09/2026Deducción
- ExpCarry – « AION 2 Cleric Guide: Best Build & Skills » (sets à 4 stigmas, site de boost)Guía o creador29/09/2026Deducción
- Inven 치유성 (KR) – « 벼락난사 캔슬과 단죄 먼지팁 » (Foudre déferlante et Condamnation pendant le groggy, discussion avec 빵호빵, 25/09)Comunidad25/09/2026Deducción
- Inven 치유성 (KR) – WindNFire, « 심단벽 벼난캔 트리 공유 » (Éclair, Condamnation, Fulguration et annulation par Foudre déferlante, 10/09)Comunidad10/09/2026Deducción
- GEGEBASE – « Cleric PvE Guide » (wiki, chronologie des patchs)09/09/2026Deducción
- IGGM – résumé du livestream global (4 stigmas au lancement contre 6 en Corée)Prensa08/09/2026Deducción
- Inven 치유성 – Clerc contre Aède en JcJ (KR)Comunidadseptiembre de 2026Deducción
- Inven 호법성 – Lumière de protection ou Mantra de l’invincibilité en progression (KR)Comunidadseptiembre de 2026Deducción
- Inven 치유성 – Châtiment de la terre relancé après le Pouvoir de la tempête (KR)Comunidadseptiembre de 2026Deducción
- Inven 치유성 – le Clerc et le Mantra de sprint de l’Aède (KR)Comunidadseptiembre de 2026Deducción
- allthings.how – tier list PvE (classements KR/TW)Prensa30/08/2026Deducción
- Inven 치유성 – « 치유성 문제점 PVP, PVE, 앞으로의 방향성 » (KR)Comunidad25/04/2026Deducción
- Inven 치유성 – « 패치후 PVE 스티그마 정리 » (KR)Comunidad22/04/2026Deducción
- Bahamut (TW) – tt77, « 治癒星從零到聖域 詳細保姆級培養攻略 »Comunidad01/01/2026Deducción
- DC Inside – « 치유성 PVP 팁준다 » (matchups 1v1, KR)Comunidad21/12/2025Deducción
- MMOexp – « Aion 2 Global Season 1 PvE Guide: Dungeons, Raids, Field Bosses, Gear, and Arcana » (site commercial)Sitio comercialDeducción
Esta guía, adaptada a tu personaje
Vincula tu personaje del juego: Aion2 Guide lee su ficha oficial, elige el build de tu actividad y te muestra qué mejorar primero.