 Aion2 Guide
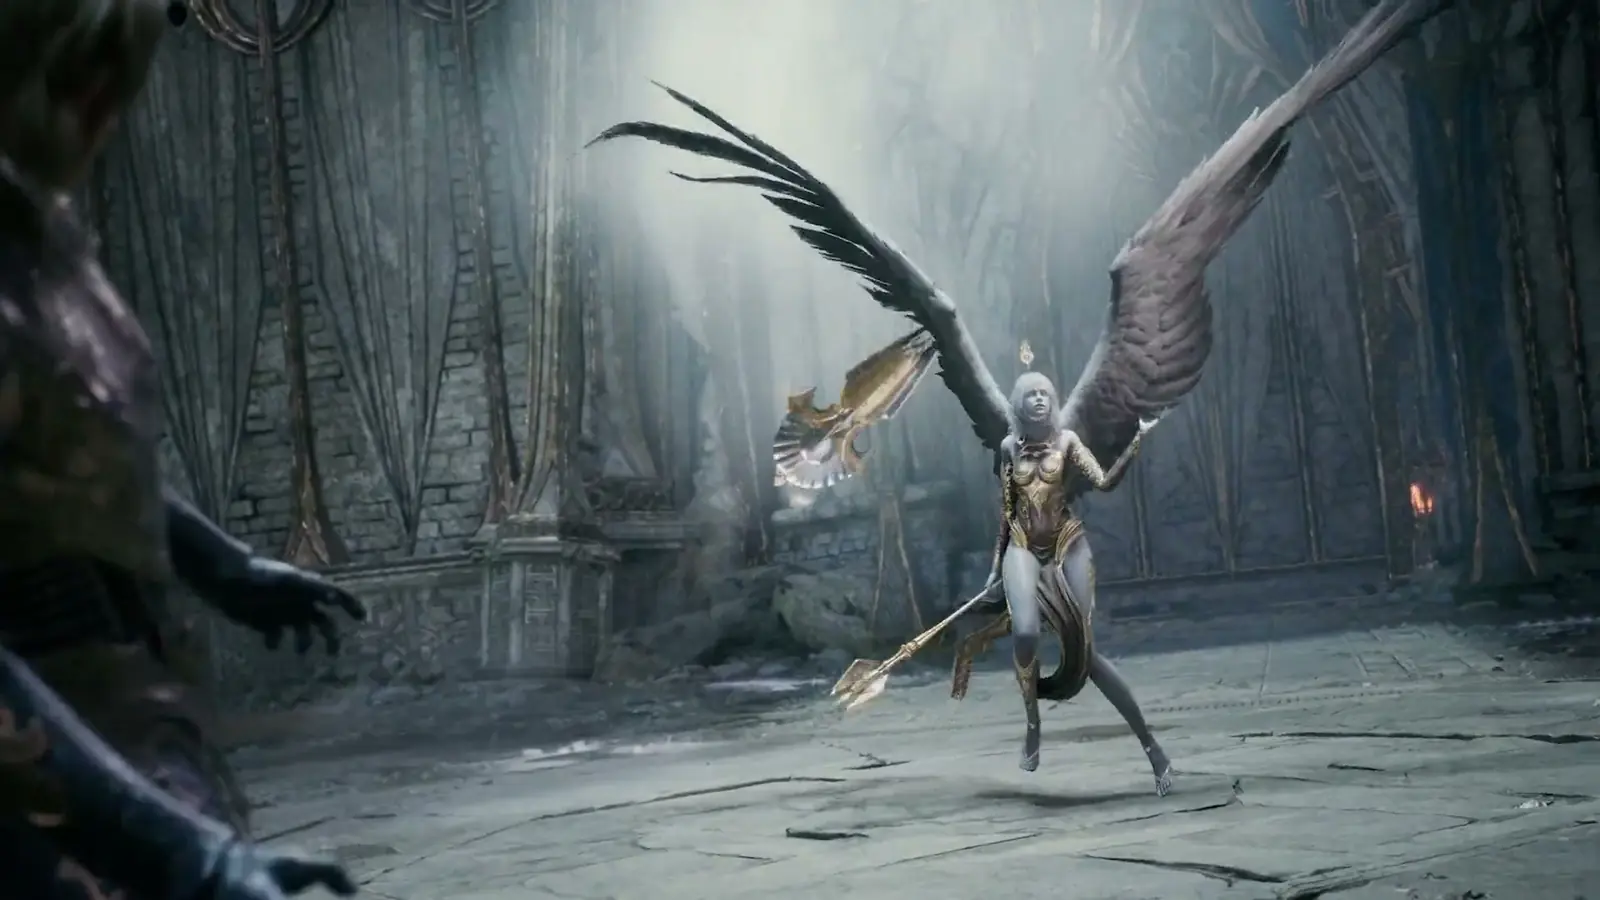
 职业攻略 · AION 2
剑星攻略
巨剑型近战猛将:他会冲入敌阵,击倒敌人,猛击地面,并在攻击时回复 HP。升级轻松,单挑令人生畏,到了终局则变得要求很高(Rage Burst 窗口、正面攻击、MP 管理与取消后摇)。
- 定位
- 近战 DPS、副坦
- 武器
- Greatsword
- 攻击距离
- 近战
攻略更新于 2026年11月13日

重点摘要
优势 5
- 升级与刷怪非常轻松:对 4 个目标的范围伤害,以及多种吸血效果。
- 1v1 单挑:突进技能(20 m)、击倒连锁、Tenaciousness(3 秒免疫)与一次净化。
- 用途多样:近战 DPS、副坦(仇恨)、格挡时的队伍增益。
- 在常规内容中对治疗的依赖不大。
- 对失衡的贡献很高(Wrath Wave 50,Ruinous Blow 25)。
弱点 5
- MP: without Rending Blow 16 or potions, you run dry in long fights (especially PvP).
- Depends on windows (Rage Burst, Prepare for Battle) and on facing the target.
- Kited by ranged classes; the weakest class in large-scale Abyss fights (KR).
- Very technical KR endgame (cancels, external macros, FPS) and a frequently adjusted class: 12% below its peak in late August (KR).
- Neither the best tank nor the best group synergy (the Templar is preferred in KR, 30/09), nor the top DPS on the latest raid (ranged DPS, KR).
需要了解的机制 此段文本仅提供英语版本。
- ›Knockdown: Overhead Slam, Upward Strike and Aerial Snare only hit a knocked-down target (Mocking Blade, Rush Strike, Wrath Wave…). On a target with Incapacitated Immunity (boss), Overhead Slam only has a 7% chance to trigger, except during the 10 s after Rage Burst.
- ›Prepare for Battle (Ruinous Blow, 20 s; Leaping Slam spec 1, 3 s): PvE Damage Boost +20%, PvP +10%, Critical Hit +100, Status Effect Chance +15%.
- ›Frontal combat: Experienced Counterstrike grants a Frontal Attack Damage Boost (4/8/12% at levels 10/20/30); the Gladiator wants to be in front of the boss, unlike other melee classes.
- ›Block: every successful Block triggers Experienced Counterstrike's party buff (20 s), heals via Protection Armor and enables Ankle Slice; Focused Block guarantees the block.
- ›Stagger (groggy): Sword Aura Rampage only hits staggered targets; Destructive Impulse adds damage on those targets.
- ›Enmity on Keen Strike, Rending Blow and Overhead Slam: enough to off-tank.
- ›Cooldown loop: Overhead Slam 12 = guaranteed crit, Lunge Stance 20 = 50% chance of -1 s on all cooldowns on each crit, Sword Aura Rampage 16 = -1 s per hit: this is what keeps the buffs rolling.
- ›Specializations: 3 options at level 8, 1 at 12, 1 at 16; slots: 1 (lvl 8), 2 (lvl 12), 3 (lvl 20). Cost: 13 points up to level 8, 21 up to 10; beyond that via Daevanion (+4 max), rings/weapon/guard and Arcana.
- ›A skill gains at most 1 level every 3 character levels, except Experienced Counterstrike, Survival Willpower and Murderous Burst (can be raised to 10 as soon as they are learned).
- ›Stigmas: 4 slots opening at levels 22, 27, 32 and 37, maximum level 20, tiers 5/10/15/20 all active; 75 shards to take one stigma to 20 (1/2/4/8 per level), 30 stigma points at 45 (29 from levels + 1 from the Ascension quest), 300 points to take all four to 20.
- ›“내절캔” cancel (KR): alternating Overhead Slam and Rending Blow while cancelling the animation; minimum cancel time since Aug 26 to reduce the gap due to ping and PC.
- ›Root: Defiance does not remove it (tooltip: Stun, Knockdown, Airborne, Grab, Frost and Fear only); since Sep 16 (KR; the global client takes the kits from that patch), Leaping Slam, Ruinous Blow and Ankle Slice (spec 3) can no longer be used while Rooted.
- ›Korea since Nov 11 (rework, adjusted on Nov 13): Prepare for Battle no longer exists; Ruinous Blow, Mocking Blade, Rush Strike, Rage Burst and Focused Block (tier 15) grant Frenzy, stacking up to 2 times; Overhead Slam and Upward Strike only trigger under Frenzy, with no base cooldown, and deal +250% damage at 2 stacks (spec 5); Ruinous Blow has a 60 s base cooldown and, with spec 3, a 2nd use recharged in 30 s; Rending Blow's spec 5 now reduces its cooldown (emergency fix of Nov 11); no more “−1 s on all cooldowns” (Lunge Stance: its own cooldown only; Sword Aura Rampage: −0.5 s on mastery skills). The Knockdown, Prepare for Battle and Cooldown loop entries above now apply to Global only.
顶尖玩家的配置
推荐配装11
每种玩法一个配装:核心技能、Stigma、目标属性与小技巧,并为每项建议附上可信度评级。
Leveling 1–45: AoE bruiser with lifesteal
Charge into packs of 3 or 4 monsters and wipe them with Crushing Wave and Rending Blow; Blood Absorption, Mocking Blade and the drain specializations (Crushing Wave, Sword Aura Rampage) keep potion use low. The Gladiator is one of the safest melee classes to level.
核心技能
Stigma
目标属性 此段文本仅提供法语版本。
- 1ATQ (améliorations d’arme, +5 max)
- 2VIT de combat
- 3Coup CRIT
- 4PV / drain
小技巧5
- Pull reasonably sized packs: your AoE skills hit at most 4 targets (tooltips).
- Rush Strike can only be used after a dodge or while flying.
- Overhead Slam: [Upward Strike] from level 8, even while levelling (Aion 2 Maps, couga54); the “AoE” specialization (ExpCarry) only serves pure pack farming.
- Since 22/07 (KR, included in the global client), lifesteal only heals from a single target: a big pack does not give you more HP back. Blood Absorption remains your main sustain.
- Rending Blow: “Changes to mobile skill” as the first specialization (Aion 2 Maps, couga54); “-20% MP consumed” (aLuckyRO) if MP runs short. Keep Keen Strike held: its hits restore your MP (+20% with its specialization).
Solo farming at level 45 (AoE + sustain)
Chain packs with no downtime: leap in, Crushing Wave, Crushing Wave again (cooldown reset on Critical Hit), Lifestealing Blade and Wave Armor, then leap to the next pack.
核心技能
Stigma
目标属性 此段文本仅提供法语版本。
- 1Coup CRIT
- 2VIT de combat
- 3ATQ
- 4PV / drain
小技巧3
- Leaping Slam spec 3: each kill resets the leap, perfect for hopping from pack to pack (Sen, aLuckyRO); at level 16, the AoE-and-pull spec gathers the pack where you land (Inven, 30/08).
- Crushing Wave: take 'Absorbs 2% HP' while it is below level 12, then the cooldown reset on Critical Hit and the 50% pull (level-16 spec) to gather stragglers.
- Lifesteal only hits one target since 22/07 (KR): your sustain mostly comes from Blood Absorption and Lifestealing Blade.
5-player dungeon / expedition: frontal melee DPS
Rage Burst windows, Overhead Slam/Upward Strike spam and Rending Blow, Prepare for Battle kept up, buffs lined up: the 'tank-DPS' Gladiator of Korean expeditions, who hits from the front.
核心技能
Stigma
目标属性 此段文本仅提供法语版本。
- 1Précision
- 2Boost de DGT en ATQ frontale (전피증)
- 3Coup puissant (강타)
- 4Boost de DGT d’arme (무피증) ≈ Boost de DGT CRIT ≈ Boost de DGT
- 5VIT de combat
- 6ATQ sur chaque ligne libre, puis Coup parfait / ATQ max
小技巧9
- With a Templar in the group, your party-wide Experienced Counterstrike is overridden by his Exaltation (Fury): keep Focused Block for mechanics, not for the buff.
- Zikel's Blessing right before a Stagger phase: +50% Stagger damage at tier 5.
- After a dodge, Rush Strike puts you back on the boss without losing time.
- Mocking Blade spec 1 absorbs 15% HP from an immune boss: your emergency 'potion' (DC guide).
- While Rending Blow only has one specialization slot (levels 8 to 11), '-20% MP consumed' prevents running out of MP (aLuckyRO); then switch to 'Changes to mobile skill'.
- Specializations: equip them in list order, skipping those not yet unlocked. E.g. Ruinous Blow: options 4 and 5 from level 16 ('fixed' according to Inven), the third one (+30% Skill Critical Hit while under the 80% cap, otherwise Skill Speed or range) at level 20.
- Soul Engraving on Global: armor, necklace and earrings take passive lines, rings, weapon and guard take active-skill lines (Overhead Slam, Rending Blow, Ruinous Blow); avoid Protection Armor (couga54).
- Stigmas: you can keep up to three skill presets, each with its own skill and stigma levels; resets are free, but you can't switch presets while a stigma is on cooldown (Aion 2 Maps).
- Crushing Wave: 8 in a boss build; raise it to 16 only for clearing dungeons, after Overhead Slam, Rending Blow and Ruinous Blow at 20. On Nov 12, the Global top 105 leave it at 7.9 on average and 45% keep it below 8 (AION 2 Meta), against 20.2, 19.7 and 18.7 for Overhead Slam, Rending Blow and Ruinous Blow; 9.8 on average among the 4,132 Gladiators tracked, 89% of whom use it (MetaBot).
5-player dungeon without a Templar: off-tank Gladiator
Enough HP, Block and lifesteal to hold the early dungeons: the Gladiator lowers the boss's Attack (Wounded, Wrath Wave) and blocks its big hits.
核心技能
Stigma
目标属性 此段文本仅提供法语版本。
- 1Précision
- 2PV / Tolérance aux DGT JcE
- 3Blocage
- 4DÉF
小技巧5
- Do not tank hard content without a Cleric: the Templar remains the main tank (MMO Codex).
- Tenaciousness (3 s of immunity) covers a deadly mechanic.
- Save Focused Block for the hits you absolutely must block: the Gladiator's Block fails about one time in five, even when very high (KR).
- Without a Templar, some KR Gladiators build enough Block ('natural block') to keep Experienced Counterstrike up without Focused Block; with a Templar in the group, it costs DPS (Inven, 30/09–01/10).
- Aion 2 Maps opener: Lunge Stance and Zikel's Blessing together when the boss can be hit, Ruinous Blow (Prepare for Battle 20 s), then hold Keen Strike, the macro and Overhead Slam; Focused Block right before each telegraphed big hit, for the party buff.
5-player dungeon without a Cleric: self-sufficient Gladiator
Same base as the DPS build, but lifesteal specializations and Lifestealing Blade come back so the group survives without a dedicated healer.
核心技能
Stigma
目标属性 此段文本仅提供法语版本。
- 1Précision
- 2PV
- 3VIT de combat
- 4Coup puissant / ATQ frontale
小技巧2
- Mocking Blade on a boss = 15% HP absorbed in an emergency.
- Blood Absorption (level 10) restores 35% HP at once below 50% HP, once per minute: do not waste Tenaciousness before it triggers.
10-player raid (Ludra Sanctuary): frontal DPS + Stagger
Same engine as the dungeon build, with more mechanics: save buffs for real windows, bring Stagger and, if your group has no Templar, the Experienced Counterstrike buff.
核心技能
Stigma
目标属性 此段文本仅提供法语版本。
- 1Précision
- 2VIT de combat
- 3Coup puissant / Boost de DGT en ATQ frontale
- 4Boost de DGT CRIT
小技巧5
- ⚠️ Ludra returned to Global on Nov 4, 2026 as “Abyssal Forge: Ludra”: Normal mode at 2,800 item level, Hard mode at 3,000, 2 hours per attempt since Nov 11 (1 hour from Nov 4 to 11), Abyss central fusion reactor HP reduced and reward group 5 guaranteed (NC notes of Nov 4 and 11). NC announced Global-specific mechanics and attacks that are not documented yet: keep this build as a base; positioning and some priorities may change.
- Placement: KR guides put melee players in group 1 (Rahu, with the Templar). If the raid has a single Templar, a Gladiator in the other group brings his Experienced Counterstrike buff there (it does not stack with Exaltation, deduced from the tooltips) and can take the boss if the tank dies.
- A KR player ranked 980k considers the Gladiator behind ranged DPS on the latest raid (Sanctuary 4): your value also comes from picking up adds and from Stagger.
- Ludra: take the red orb with Focused Block or, safer, Tenaciousness (KR guides).
- Reliability: Ludra (“Abyssal Forge: Ludra”) requires 2,800 item level in Normal and 3,000 in Hard since Nov 4 (NC note); on Oct 3, the ten best Gladiators tracked by MetaBot were between 1,800 and 2,260: the mechanics come from Aion 2 Maps and the Korean guides (for 8 players); NC announced Global-specific mechanics that are not documented yet.
1v1 arena: control + burst duelist
Stick to your target, knock it down, slam the ground and outlast it with lifesteal and Tenaciousness: in KR, Gladiator players rate the class 'S' in 1v1 (Inven PvP, March 2026).
核心技能
Stigma
目标属性 此段文本仅提供法语版本。
- 1Boost de DGT JcJ (« 피피증 »)
- 2Tolérance aux DGT JcJ / PV
- 3RÉS aux altérations d’état
- 4Précision
- 5VIT de combat
小技巧4
- Raise Rending Blow to 16 (+50 MP on Critical Hit) before long duels; several KR players lower Crushing Wave to afford it.
- Do not spend both gap closers before your target has used its escape (ExpCarry).
- Against a Ranger or a Sorcerer, the +16 m range of Ankle Slice (after a Block) and the +12.5 m of Ruinous Blow work as extra gap closers.
- Overhead Slam in PvP: September KR answers take lifesteal, [Upward Strike] and no cooldown (1/3/5); August answers preferred the guaranteed Critical Hit over [Upward Strike] (1/4/5).
5v5 arena: anti-heal diver
Isolate the enemy healer or caster: Blade Toss (-50% healing received, -30% Defense), knockdown, burst, and survive the focus with Tenaciousness.
核心技能
Stigma
目标属性 此段文本仅提供法语版本。
- 1Boost de DGT JcJ
- 2Tolérance JcJ / PV
- 3Précision
- 4RÉS aux altérations
小技巧3
- In KR, Gladiator players rated the class 'A' in small groups (4-player arena in March, before the Jul 1 move to 5v5), versus 'S' in 1v1: its strength is pressure on one target, not area control.
- On 12/08 (KR), class anti-heals (including Blade Toss) were strengthened and the general healing malus in the Abyss and arenas went from 30% to 20%: anti-heal now relies more on skills like yours.
- Leaping Slam 16 'AoE and pull' gathers the enemies around your target for your team's area damage (KR PvP specs 1/3/5 or 3/4/5).
Solo Abyss (Lower Reshanta): isolated-target hunter
Roam, pick isolated or already engaged targets, knock them down and finish them while staying alive with lifesteal and Tenaciousness.
核心技能
Stigma
目标属性 此段文本仅提供法语版本。
- 1PV / Tolérance JcJ
- 2RÉS aux altérations
- 3Boost de DGT JcJ
- 4Précision
小技巧4
- 1v1 is the class's strong point; avoid large-scale war zones when solo.
- Watch for Abyss bosses: in KR, since Sep 23, party buffs are replaced there by a shared buff — no effect on solo play; to be checked on Global (lower Abyss only, up to 1,500 players).
- Leaping Slam 16: the cooldown reset on a kill lets you leap to the next target right after a kill.
- Abyss time is limited to 7 hours a week (reset on Wednesday) and the Abyss opens at level 45 with 1,000 item level (Aion 2 Maps): pick your fights.
Group Abyss / large-scale war: front line
A thankless role in KR: the Gladiator is rated the weakest class in large-scale fights (focus, kiting, invulnerability quickly stripped). So you play a disciplined front line: anti-heal, area control, survival.
核心技能
Stigma
目标属性 此段文本仅提供法语版本。
- 1PV / Tolérance JcJ
- 2RÉS aux altérations
- 3Boost de DGT JcJ
小技巧3
- In KR, 'invulnerability is stripped in one second' in big brawls: do not count on it to hold alone (Inven 32266).
- KR 23/09: when a Lower/Middle Abyss boss appears, Experienced Counterstrike and Predation are replaced by the shared buff 'Battlefield Might'. Aion 2 Maps (Oct 1) does not count it among the two Sep 23 changes missing from Global; Global's Abyss only opens its lower layer (up to 1,500 players): to be checked in game.
- Crushing Wave: 50% pull (level-16 spec) and cooldown reset on Critical Hit to gather enemies into your side's area attacks (a KR player's choice, Inven 28/09); before level 12, take the 2% lifesteal.
10v10 battleground (gear and skills equalized)
When gear and skill levels no longer matter, the kit decides: gap closers, knockdowns, anti-heal and two 'extra lives' (Defiance, Tenaciousness).
核心技能
Stigma
目标属性 此段文本仅提供法语版本。
- 1Aucune (équipement égalisé)
小技巧1
- Do not dive the back line alone: even in KR, ranged DPS dominate large-scale fights.
技能46
国际服该职业的所有技能,包含习得等级与冷却时间。点击技能可查看完整资料页。
主动技能 12
- Coup acéré · 예리한 일격
Basic attack (left click): damages up to 4 enemies within 4 m, increases Enmity and restores 100 MP. Chain: Keen Strike → Rupture Strike → Wrathful Strike; the level-16 specialization adds a 4th hit, [Reckless Strike]. Your main MP source while leveling; in KR endgame, players stop using it on bosses once Overhead Slam stays active permanently (DC guide, Inven, Sept. 2026).
- Coup féroce lacérant · 절단의 맹타
Main attack (right click): damages up to 4 enemies within 4 m, increases Enmity, 2 Stagger. Chain: → Smashing Blow. The 'Rending' half of the Korean Overhead Slam ↔ Rending Blow cancel ('내절캔'), back since early September. Level 16 (+50 MP on Critical Hit) solves most MP problems.
- Frappe bondissante · 도약 찍기
Leaps to a target within 20 m and deals damage (10 Stagger). No MP cost since 08/07 (KR). Since 16/09 (KR), it cannot be used while Rooted. Spec 3 is for farming (cooldown reset on each kill), spec 1 for boss openers (Prepare for Battle for 3 s).
- Épée dévastatrice · 유린의 검
Damages a target within 4 m and inflicts Knockdown for 3 s (different animation on targets with Incapacitated Immunity), 15 Stagger. It enables Overhead Slam and Aerial Snare outside boss fights and in PvP. Against bosses, it is mostly an emergency lifesteal tool (spec 1).
- Fracas · 내려찍기
Damages a Knocked-down target within 4 m and increases Enmity (5 Stagger). On a target with Incapacitated Immunity (boss) it only has a 7% chance to trigger, or is guaranteed for 10 s after [Rage Burst]. The core of single-target damage: at level 16 its 5 s cooldown disappears, hence the Korean Overhead Slam/Upward Strike spam. Two-hit animation since 19/08 (KR). In Korea since Nov 11: no more 7% trigger on immune targets and no base cooldown; Overhead Slam triggers while the caster has Frenzy (Ruinous Blow, Mocking Blade, Rush Strike, Rage Burst, Focused Block), its base damage drops by about 50% and spec 5 gives +250% damage at 2 Frenzy stacks instead of removing the cooldown.
- Lame déferlante · 검기 난무
Damages a Staggered target within 4 m (the 'groggy' phase). Spam it during Stagger windows; the level-16 spec (-1 s on all cooldowns per hit) recharges Lunge Stance, Zikel's Blessing and Lifestealing Blade during the groggy phase (DC guide).
- Entaille de chevilles · 발목 베기
Usable after a successful Block: damages up to 4 enemies around a target within 4 m, 50% chance of Root for 3 s (100% on NPCs), 10 Stagger. With spec 3 (+16 m) it becomes a gap closer; since 16/09 (KR), spec 3 cannot be used while Rooted.
- Onde broyeuse · 분쇄 파동
Damages up to 4 enemies within 5 m around you (5 Stagger). Chain: → Frenzied Wave. The AoE engine of leveling and farming: at level 12, a Critical Hit resets its cooldown. Top priority in Season 1 TW/KR guides (late 2025), secondary on bosses since summer 2026. Its lifesteal only applies to one target since 22/07 (KR).
- Coup de ruée · 돌진 일격
After [Dodge] or while flying: rushes to a target within 10 m and deals damage with a 30% chance of Knockdown for 3 s (100% on NPCs), 10 Stagger. A major PvP tool (engage + knockdown); in PvE it brings you back to the boss after a dodge.
- Contrainte aérienne · 공중 결박
Damages a Knocked-down target, 50% chance of Airborne for 3 s (100% on NPCs), 20 Stagger; 5% chance to trigger on immune targets. [Forced Fall] chain at spec 12. A key 1v1 control; optional in PvE (consultant 빵호빵 notes a DPS gain when it is added to the cycle, the DC guide considers it expendable).
- Coup féroce anéantissant · 파멸의 맹타
Rushes to a target within 7.5 m, damages up to 4 enemies and grants Prepare for Battle for 20 s (PvE Damage Boost +20%, PvP +10%, Critical Hit +100, Status Effect Chance +15%), 25 Stagger. An instant AoE skill since 19/08 (KR): videos showing a 'charge' are outdated. Its damage share dropped when the Overhead ↔ Rending cancel came back (Sept. 2026): level it after Overhead Slam and Rending Blow (빵호빵). Cannot be used while Rooted since 16/09 (KR). In Korea since Nov 11 (adjusted on Nov 13): Prepare for Battle no longer exists; on impact it grants Frenzy for 10 s (PvE Damage Boost +20%, PvP +10%, Frontal Boost +3%, enables Overhead Slam, 2 stacks); base damage +50%; 60 s base cooldown and 100 MP; spec 3 adds a 2nd use recharged in 30 s; it no longer cancels itself.
- Dissipation de choc · 충격 해제
Removes Stun, Knockdown, Airborne, Grab, Frost and Fear (not Root), then grants Tenacity (status effect immunity) for 5 s. Unaffected by cooldown reduction. In KR PvP players keep it high ('Defiance is an extra life'); in PvE, level 8 is enough (DC guide).
连锁技 11
- Coup de rupture · 파열의 일격
Second hit of the Keen Strike chain: damages up to 4 enemies within 4 m, increases Enmity, restores 100 MP.
- Coup de rage · 분노의 일격
Third hit of the Keen Strike chain: damages up to 4 enemies within 4 m, increases Enmity, restores 120 MP.
- Coup féroce fracassant · 격파의 맹타
Second hit of Rending Blow (120 MP, 2 Stagger). Its cancel point moved to the 2nd hit on 12/08 (KR).
- Onde frénétique · 광폭 파동
Second hit of Crushing Wave (250 MP, 5 Stagger).
- Coup montant · 올려치기
Chain added by Overhead Slam's level-8 spec n°3 (Overhead Slam 8 = character level 22). Korean benchmark 'Upward Strike hits per minute': about 90 to 102 on a training dummy for top players (빵호빵, 05/09/2026). In Korea since Nov 11: like Overhead Slam, base damage about −50%, no base cooldown, triggered under Frenzy.
- Danse de lame · 칼날 화무
Second hit of the Blade Toss stigma; at tier 20 it has a 30% chance to inflict Knockdown for 3 s.
- Ruée destructrice · 파괴 돌진
Chain added at tier 10 of the Fracturing Rush stigma.
- Chevilles brisées · 발목 격파
Chain added by Ankle Slice's level-8 spec n°2 (level 8 is reached at character level 25).
- Explosion de rage · 분노 폭발
Chain added by Defiance's level-8 spec n°1 (level 8 at character level 34). Sen uses it in PvP right after the cleanse. Not to be confused with the Rage Burst stigma.
- Coup téméraire · 무모한 일격
Fourth hit added by Keen Strike's level-16 specialization (skill level 16 requires levels beyond skill points); restores 150 MP.
- Chute forcée · 강제 낙하
Chain added by Aerial Snare's level-12 spec (skill level 12 requires Daevanion, gear or Arcana).
Stigma 13
- Onde de rage · 분노의 파동
Damages up to 4 enemies within 5 m, 50% chance of Knockdown for 3 s (100% on NPCs), 50 Stagger (the highest value in the kit). The 'groggy breaker' stigma of Season 1 guides (level 1 was enough); situational today.
- Position de charge · 돌격 자세
Combat Speed +20% for 10 s. Some English sites call it 'Assault Stance'. Tier 20 (50% chance of -1 s on all cooldowns per Critical Hit) keeps the buffs looping: the stigma to finish first according to the DC guide and Storyteller (via MMO Codex).
- Bénédiction de Zikel · 지켈의 축복
Attack +20% and Accuracy +100 for 10 s, self only since 08/07 (KR). Guides that present it as a party buff predate July.
- Blocage ciblé · 집중 막기
For a short moment: Block damage reduction +100% and guaranteed weapon Parry; restores 110 MP and Stamina once on a successful Parry. Triggers [Experienced Counterstrike] (party buff) and enables [Ankle Slice]. Use it on big damaging hits, not against crowd control (Chopy).
- Armure d'équilibre · 균형의 갑옷
Impact-type Resist +50% for 10 s (stun, knockdown, etc.). The anti-control stigma of PvP (arena, Abyss); since 08/07 it no longer multiplies Experienced Counterstrike in PvE.
- Lancer de lame · 칼날 날리기
Damages a target within 20 m, Defense -30% and Incoming Heal -50% for 10 s (5 Stagger); chain [Blade Dance]. The Gladiator's anti-heal (group PvP, against Clerics and Chanters) and a ranged poke.
- Persévérance · 근성
Immune to damage and status effects for 3 s, then PvE Damage Tolerance +50% / PvP +25% for 3 s. Does not stack with other invincibility effects (30 s lockout). The 'second life' of 1v1; in PvE it lets you ignore some mechanics (KR guides, e.g. Ludra's red orb).
- Lame vampirique · 흡혈의 검
Damages up to 4 enemies within 4 m and absorbs 10% HP (20 Stagger). At tier 10 it applies Predation to the party for 20 s (lifesteal + extra damage). Strongly recommended by Sen and the DC guide; its party effect has been replaced in KR Abyss boss fights since 23/09 (Battlefield Might).
- Explosion de fureur · 격노 폭발
Damages a target within 4 m. On hit: Wounded on the target (Attack -10%, 10 s), PvE Damage Boost +10% / PvP +5% for 10 s on yourself, and [Overhead Slam] enabled for 10 s even on an immune target. The key to boss DPS (without it, Overhead Slam only triggers 7% of the time) and to PvP burst. Wounded does not stack with Shrink from the Templar's [Taunt].
- Armure d'onde · 파동의 갑주
Continuous damage to up to 4 enemies within 3 m for 10 s. Mostly a multiplier: tier 10 = [Experienced Counterstrike] ×1.5, tier 15 = [Murderous Burst] ×1.5. Chopy considered it essential after July (via MMO Codex).
- Contrainte forcée · 강제 결박
Damages a target within 4 m, 75% chance of Seal (silence) for 5 s (100% on NPCs), 20 Stagger. Sen calls it 'extremely important' in PvP against casters and healers.
- Ruée fracturante · 분쇄 돌진
Rushes 10 m forward, damaging up to 4 enemies on the path, 60% chance of Root for 3 s (100% on NPCs), 20 Stagger. Stigma added in the KR rework of 25/03/2026. Since 23/09 (KR), it goes in the direction of the key you press.
- Frappe d'assaut · 강습 일격
Targets an enemy within 20 m: damages up to 4 enemies around it, 30% chance of Knockdown for 3 s (100% on NPCs); Defense up to +20% depending on the number of enemies hit. Presented by Chopy (Dec. 2025) as a diving attack to use while flying or gliding – to be checked. In KR (01/10), cited as a damage stigma when a Templar holds the boss (tier 5: Attack +20% for 5 s).
被动技能 10
- Position de survie · 생존 자세
HP, Max HP %, natural regeneration and Damage Tolerance. The base of the off-tank build and of PvP.
- Armure de protection · 보호의 갑옷
Block +200 and a heal on each successful Block (1 s cooldown). Useful for the off-tank; low priority for DPS.
- Drain de sang · 피의 흡수
50% chance on each hit to restore HP plus a % of Max HP (1 s cooldown); instant heal below 50% HP (60 s cooldown). The survival passive of leveling and of groups without a Cleric.
- Détection des faiblesses · 약점 파악
Critical Hit and Perfect Chance. Multiplied ×1.5 during Lunge Stance (tier 15).
- Préparation d'attaque · 공격 준비
PvE/PvP Damage Boost, Defense % and Accuracy +100 (flat). The most unconditional gain at 45.
- Coup de choc · 충격 적중
Impact-type status chance (knockdowns, stuns) and Double Chance (강타).
- Impulsion destructrice · 파괴 충동
Extra damage against a target afflicted with an Impact-type status or Stagger.
- Riposte habile · 노련한 반격
Permanent Front Attack Damage Boost, plus a party buff (PvE/PvP Damage Boost, 20 s) on each successful Block; the buff does not stack with the Templar's [Fury] (Exaltation). Learned at level 21 and can be raised to 10 immediately (no level delay). The n°1 passive for KR PvE analysts.
- Volonté de survie · 생존 의지
Status Effect Resist; temporary Damage Tolerance when hit while crowd-controlled (60 s cooldown); stacking resist for each hit taken while controlled (10 stacks). A PvP passive. Learned at 23 and can be raised to 10 immediately.
- Rupture meurtrière · 살기 파열
Each hit grants a Menace stack (3 s); at 5 stacks: damage to 4 enemies within 5 m and a Critical Damage Boost on yourself for 3 s (almost permanent in combat). Learned at 25 and can be raised to 10 immediately.
技能循环12
各种情境下的技能施放顺序。
首领起手
拉副本或团队副本的首领,守护星已就位。
- 1
 Ruinous BlowAoE 冲锋,范围 7.5 m(8 级专精第 2 项为 20 m):Prepare for Battle 持续 20 秒。
- 2
 Rage BurstWounded(首领攻击力 −10%)、PvE 伤害提升 +10%,并使 Overhead Slam 激活 10 秒。
- 3
 Lunge Stance战斗速度 +20%,持续 10 秒。
- 4
 Zikel's Blessing攻击力 +20%,命中 +100,持续 10 秒(自 7 月 8 日起仅对自身生效)。
- 5
 Lifestealing Blade10% 吸血;第 10 阶:为队伍附加 Predation,持续 20 秒。
- 6
 Overhead Slam
- 7
 Upward Strike
- 8
 Rending Blow取消 Overhead Slam,开启循环。
- 9
 Smashing Blow
Overhead Slam ↔ Rending Blow 循环(“내절캔”)
首领战,每个 Overhead Slam 激活的窗口期内(Rage Burst 之后的 10 秒,或目标被击倒时)。
- 1Overhead Slam一旦可用就立刻使用。
- 2Upward Strike
- 3Rending Blow取消后摇。
- 4Smashing Blow取消点在这第 2 击上。
- 5
 Keen Strike穿插普通攻击(为了 MP)。
Rage Burst 窗口(爆发)
每次 Rage Burst 冷却完毕(45 秒,第 5 阶为 30 秒)。
- 1Rage BurstOverhead Slam 激活 10 秒。
- 2Lunge Stance如果可用(冷却 60 秒:每隔一轮爆发使用)。
- 3Zikel's Blessing如果可用(冷却 120 秒:每四轮爆发使用一次)。
- 4Overhead Slam
- 5Upward Strike
- 6Rending Blow
- 7Overhead Slam
- 8Upward Strike
- 9Ruinous Blow如果 Prepare for Battle 即将结束(冷却 45 秒)。
基础宏(aLuckyRO)与 KR 的“Y/T”方案
升级、刷怪、简单的首领。
- 1Rage Burst使 Overhead Slam 可用 10 秒。
- 2Ruinous BlowPrepare for Battle。
- 3Keen Strike仅限动作模式;锁定模式下由自动攻击取代这一行。
AoE 怪群(“무한 분쇄파동”)
3 至 4 只怪物组成的怪群。
- 1
 Leaping Slam跃入怪群(20 m,不耗 MP)。
- 2
 Crushing Wave5 m 内的 4 个目标。
- 3
 Frenzied Wave
- 4Keen Strike对 4 个目标产生仇恨并恢复 MP。
- 5Rending Blow
- 6Crushing Wave靠暴击频繁重置冷却,能反复使用。
- 7Lifestealing Blade大怪群时 10% 吸血。
打空失衡条,再趁失衡状态猛攻
首领带有可见的失衡条。
- 1Zikel's Blessing第 5 阶:对失衡条的伤害 +50%;留到这个时刻再用。
- 2
 Wrath Wave失衡值 50,5 m 内的 4 个目标。
- 3Ruinous Blow失衡值 25。
- 4Rage Burst失衡值 20。
- 5
 Sword Aura Rampage一进入失衡状态就连续使用。
- 6Overhead Slam如果 Overhead Slam 处于激活状态,就在两次 Sword Aura Rampage 之间使用。
恢复 MP
长时间战斗,尤其是 PvP 中面对守护星或治愈星时。
- 1Keen Strike+100 MP。
- 2
 Rupture Strike+100 MP。
- 3
 Wrathful Strike+120 MP。
- 4
 Focused Block重击时:一次性 +110 MP 与耐力。
- 5Sword Aura Rampage失衡状态下,配合 8 级专精“+120 MP”。
副坦循环
没有守护星的副本,或需要接手小怪时。
- 1Keen Strike对 4 个目标产生仇恨。
- 2Rending Blow对 4 个目标产生仇恨。
- 3Focused Block必定格挡:队伍获得 Experienced Counterstrike 增益,持续 20 秒,并恢复 110 MP。
- 4
 Ankle Slice格挡之后:4 个目标,50% 几率定身。
- 5Rage BurstWounded:首领攻击力 −10%(第 10 阶为 −20%)。
- 6Overhead Slam产生仇恨(如果处于激活状态)。
PvP:抓人击杀(1v1)
1v1 竞技场、Abyss。
- 1Leaping Slam20 m;自 9 月 16 日起,被定身时无法使用。
- 2
 Mocking Blade击倒 3 秒。
- 3Rage BurstOverhead Slam 激活 10 秒,即使击倒被抵抗也一样。
- 4Overhead Slam
- 5Upward Strike
- 6
 Aerial Snare目标倒地时:浮空 3 秒。
- 7FFForced Fall
- 8Ruinous BlowPrepare for Battle,贯穿剩余的爆发。
PvP:闪避后接 Rush Strike
目标拉开距离时,或者你需要在 PvE 与 PvP 中躲开一次攻击时。
- 1
 Rush Strike冲刺 10 m(带专精为 20 m),30% 几率击倒 3 秒(对 NPC 为 100%)。
- 2Overhead Slam如果目标倒地。
- 3Upward Strike
PvP:压制治疗
5v5 竞技场、Abyss,面对治愈星或护法星时。
- 1
 Blade Toss防御力 −30%,受到的治疗 −50%,持续 10 秒。
- 2
 Blade Dance
- 3Leaping Slam
- 4
 Forced Restraint75% 几率造成封印,持续 5 秒。
- 5Rage Burst
- 6Overhead Slam
PvP:扛过敌方爆发
你被多名敌人控制或集火。
- 1
 Defiance净化,并获得 Tenacity 5 秒。
- 2WBWrath Burst净化后立刻反击(8 级专精第 1 项)。
- 3
 Tenaciousness三名敌人同时以你为目标时,获得 3 秒免疫。
- 4
 Armor of Balance冲击类抗性 +50%,持续 10 秒。
升级 1 → 45此段文本仅提供英语版本。
每个等级区间该优先提升哪些技能,以及快速升级的技巧。
1 至 8 级
Keen Strike and Rending Blow as high as allowed (a skill gains at most 1 level every 3 character levels), then Leaping Slam (Aion 2 Maps). Mocking Blade (3) knocks down and Overhead Slam (4) hits the knocked-down target: from level 4, one macro line (Overhead Slam first, Rending Blow behind), left click held for MP. Crushing Wave arrives at 8: keep it for packs, by hand.
9 至 18 级
Keep both clicks ahead (level 8 at 19), then Leaping Slam, Overhead Slam and Mocking Blade to 8 as soon as they can. Passives: nothing urgent, only Experienced Counterstrike and Attack Preparation matter while levelling (Grobs) and Blood Absorption already heals well at level 1. Ruinous Blow (14) goes near the top of the macro (Aion 2 Maps). Nezekan board at 12: its Overhead Slam, Rending Blow, Ruinous Blow and Keen Strike nodes (Grobs' route: +2 on those four skills with Zikel at 20).
19 至 25 级
First specializations at 19: Keen Strike “+20% MP restored”, Rending Blow “mobile skill” (“−20% MP cost” if MP runs short), Leaping Slam “reset on kill”. Experienced Counterstrike (21) goes up in one go. Stigmas from 22 (one more slot at 27, 32 and 37): open the ones you'll keep at 45 straight away, each to tier 5 before the next; Rage Burst then goes to the top of the macro line (Grobs). Overhead Slam 8 at 22: take [Upward Strike]. Zikel board at 20.
26 至 38 级
Crushing Wave and Sword Aura Rampage to 8 (drain), Overhead Slam and Rending Blow to 10 (28–29), Ruinous Blow to 10 at 38; Experienced Counterstrike 10 at 33, Attack Preparation next. Switch to the three held keys (Keen Strike, Rending Blow line, Overhead Slam on its own key) for expeditions. Vaizel board at 30; Zikel's Blessing in the 4th slot (37).
39 至 45 级
Attack Preparation 10 at 43, Identify Weakness next. At 45, reset (free) into the split below and finish Murderous Burst and Impact Hit with the district quests' Wisdom Stones. Triniel board at 40, Azphel (PvP) at 45. After that, levels above 10 come from nodes, rings and Arcana: aim for Overhead Slam 16 (no cooldown) and Rending Blow 16 (+50 MP on crit), then let go of Keen Strike on bosses; for gear, the weapon first, then the guard (keep the Spiritforged Greatsword and Guard until Aulamus and Vakron pieces).
46 至 50 级
Korea only (maximum level 55 since Nov 11, 50 before): 5 stigma slots then a 6th at 50, advanced shards up to tier 25. The best Koreans (aion2tool, Oct 5) push Lunge Stance, Zikel's Blessing and Wave Armor to 25 and Lifestealing Blade to 22–23, and keep Rage Burst and Focused Block at 20; skills at 20: Overhead Slam, Rending Blow and Ruinous Blow; passives: Experienced Counterstrike (30–36), Murderous Burst (29–32), Attack Preparation (24–30), Impact Hit. Marchutan and Yustiel boards on top of the six Global ones (Ariel arrived there on Oct 21).
升级技巧
- ›Follow the main story (yellow quests) and pick up the feathers: the Failure Guild speedrun guide aims for 245 feathers between levels 10 and 21.
- ›Don't enhance your weapon and accessories beyond +5 before 45 (Failure Guild, MMO Codex).
- ›Switch to Target mode (Aion 1 / “Top Target”): basic attacks slot in on their own between skills (aLuckyRO). In Action mode, add Keen Strike to the macro.
- ›Experienced Counterstrike (21), Survival Willpower (23) and Murderous Burst (25) can be raised to 10 immediately: keep a few points in reserve before those levels.
- ›For story bosses and solo dungeons, a stagger stigma (Wrath Wave, 50 Stagger) speeds up the groggy; Tenaciousness saves you from deadly mechanics.
- ›Against immune targets (bosses), Overhead Slam only triggers at 7% without Rage Burst: while leveling, your single-target DPS relies on Rending Blow.
- ›The Gladiator hits harder from the front (Experienced Counterstrike): no need to go around monsters.
- ›Level 45 split (Global budget: 203 points, Global client read by Aion 2 Maps and MetaBot): Overhead Slam, Rending Blow, Ruinous Blow and Keen Strike at 10, Experienced Counterstrike and Attack Preparation at 10, then Leaping Slam 10, Crushing Wave, Sword Aura Rampage and Mocking Blade 8, Identify Weakness 9; the district quests' Wisdom Stones (58) finish Murderous Burst and Impact Hit. Leaping Slam goes ahead of Crushing Wave because the top Global players raise it higher in all four readings (official sheets of the top 10 on Oct 5: 13.7 vs 10.3 on average; MetaBot, aion2tool, AION 2 Meta); if you mostly farm, keep Crushing Wave at 10. Overhead Slam specialization: [Upward Strike] rather than the drain (0.7% since Aug 26) for bosses; Sword Aura Rampage: “Absorbs 5% HP” (Aion 2 Maps).
- ›Since Jul 22 (KR), a drain only applies to one target: on a pack, Blood Absorption and potions remain your survival.
PvP此段文本仅提供英语版本。
这个职业在 PvP 中的定位,以及面对各个对手的打法。
Duelist and diver: excellent in 1v1 (knockdown → Overhead Slam → Aerial Snare, drain, Tenaciousness), decent in small groups (A), weak in Abyss large-scale war where it gets kited and focused (Inven KR ratings from March: 1v1 S / small group A / mass C, before the arena moved to 5v5 on Jul 1). In 10v10 (gear and skills equalized), its control and survival kit matters more than gear.
对阵各职业 8
 守护星威胁度
- Long fight on equal footing: your MP runs dry (Inven 31695) → Rending Blow 16 (+50 MP on crit), Mana Potions, juice.
- Blade Toss (Defense -30%, healing -50%) and Forced Restraint before your burst.
- If the fight goes past a minute without an advantage, disengage (KR advice).
- 剑星威胁度
- The first knockdown often decides it: keep Defiance for their Mocking Blade / Rush Strike.
- Tenaciousness right before their Rage Burst + Overhead Slam.
- Armor of Balance reduces their knockdown chains.
 杀星威胁度
- They have the initiative (stealth): keep Defiance and Tenaciousness for their opener, not for the rest.
- Armor of Balance against their CC; survive the opener and your drain wins the long fights.
- Hit them on the ground: they are fragile once knocked down.
 弓星威胁度
- They kite you: chain Leaping Slam (20 m), Rush Strike after a dodge (+10 m), Ruinous Blow (+12.5 m) — one at a time, after their retreat jump.
- Fracturing Rush (root) cuts off their escape.
- Higher threat in open terrain / Abyss (4).
 魔道星威胁度
- At range they inflict Frost or Fear on you: Defiance removes Frost and Fear.
- Forced Restraint (Seal 5 s) cuts off their spells once in melee range (Sen).
- In melee, the advantage is yours: at equal gear, a ranged class struggles to win a 1v1 when the melee takes the initiative (Inven PvP, March 2026).
 精灵星威胁度
- Ignore the spirit, aim for the master.
- Save your cleanse for their Fear.
- Forced Restraint against their summons/spells.
 治愈星威胁度
- Not very dangerous but very hard to kill: Blade Toss (healing -50%, -70% at tier 5; shields destroyed at tier 15).
- Forced Restraint to prevent heals.
- Watch your MP (“against Templars and especially Clerics, MP dries up”, Inven 31695).
 护法星威胁度
- Heal/damage hybrid: Blade Toss to cut their healing.
- Defiance for their stuns, Armor of Balance against their knockdowns.
- Don't let them drag the fight out: Rage Burst + Overhead Slam from the first contact.
PvP 小技巧
- ›Rage Burst is your win condition: without it, Overhead Slam doesn't trigger outside a knockdown (Inven 32263, Sep 27, 2026).
- ›Defiance = one life; don't level it below 16 in serious PvP (Inven 31695 consensus).
- ›Put neither Defiance nor the defensive stigmas in a macro.
- ›Set up a separate PvP preset (skills, specs, stigmas): Sen uses one PvE preset and one PvP preset.
- ›Since Sep 16 (KR; the global client takes the kits from that patch), Leaping Slam and Ruinous Blow can no longer be used while Rooted, and Defiance does not remove Root: wait for it to end before engaging.
- ›Avoid large-scale wars solo: in KR, the Gladiator is judged the least useful there (Inven 31994).
- ›The threat figures are an editorial summary (documented kits + Inven feedback), not a statistic.
- ›PvP gear on Global: the Abyss sells no gear (Abyss Points: skins, Stigma Shards, Azphel crystals, Potential); keep your crafted PvE gear and add PvP lines (Abyssal manastones, Potential), the Fierce Battle Amulet (PvP Damage Boost 20%) and the Azphel board (Aion 2 Maps, Oct 2).
组队此段文本仅提供英语版本。
这个职业能为队伍带来什么,以及合适的搭配。
能带来什么 7
- Melee DPS with area damage: almost all its attacks hit up to 4 enemies (tooltips), ideal on packs.
- Off-tank: Keen Strike, Rending Blow and Overhead Slam increase Enmity; it picks up the adds and can tank easy dungeons.
- Experienced Counterstrike: on every successful Block, PvE Damage Boost +9% / +13% / +17% for the whole party for 20 s (levels 10/20/30) — does not stack with the Templar's Fury.
- Lifestealing Blade (tier 10): Predation on the party for 20 s (drain + additional damage).
- Debuffs: Rage Burst's Wounded (boss Attack -10%, -20% at tier 10), Wrath Wave tier 10 (Attack -20% for 5 s), Blade Toss (Defense -30%, Incoming Heal -50%).
- Stagger: Wrath Wave 50, Ruinous Blow 25, Rage Burst / Lifestealing Blade / Forced Restraint / Fracturing Rush 20, Mocking Blade 15; Zikel's Blessing tier 5: +50% Stagger damage.
- Self-sufficiency: multiple drains, not very dependent on the healer in regular content.
需要队伍提供什么 4
- A Templar as main tank, so you can hit from the front without managing aggro (the KR player ranked 980k: “even the Gladiator needs a Templar to express its potential”).
- A Chanter: Power of the Storm (Combat Speed, cooldowns) and Undefeated Mantra (불패의 진언); “a Chanter's presence hugely changes the baseline DPS” (same player).
- A Cleric for healing and resurrection, and their party damage buff (보호의 빛).
- Blockable boss patterns (for Experienced Counterstrike) and a boss that stays put (the frontal bonus requires being in front of it).
搭配 8
- 守护星
Historic pair of the Korean “수검호치” compositions. The Templar tanks, you hit from the front. But Fury (Templar) and Experienced Counterstrike's party buff do not stack, and Rage Burst's Wounded does not stack with the Shrink of [Taunt]. Both party buffs were reduced on Aug 26 (KR). In pure DPS, a well-geared Templar rivals the Gladiator on short fights (Inven 31298).
- 剑星
Two Gladiators split the packs; stacking two Experienced Counterstrike buffs is not documented anywhere (probably doesn't stack: same effect). Only one should off-tank.
- 杀星
Complementary: the Assassin does the single-target burst, you hold the adds and bring Blade Toss (Defense -30%).
- 弓星
The ranged DPS benefits from you holding the adds; in KR, ranged DPS dominate the most recent raid (980k player).
- 魔道星
Same logic as the Ranger; you protect a fragile caster by pinning down the adds.
- 精灵星
Same logic; in KR the Spiritmaster is also cited among the ranged DPS that outdamage the Gladiator in Sanctuary 4.
- 治愈星
Healing, resurrection and 보호의 빛 (Light of Protection, party damage buff): with a Cleric, switch your drain specs to damage specs.
- 护法星
Power of the Storm (Combat Speed, cooldowns): reach the Combat Speed plateau faster and keep Lunge Stance rolling; Undefeated Mantra (불패의 진언) does not stack with the Cleric's equivalent buff (Chanter guide).
常见错误23此段文本仅提供英语版本。
从攻略与玩家经验中整理出、代价最高的错误。
- 1Copying a KR build with level 25 stigmas or 6 stigmas: on Global, stigmas stop at 20 and there are only 4 slots.
- 2Following a video older than Aug 19: Ruinous Blow is no longer charged and Rending Blow can no longer be cancelled on the 1st hit.
- 3Presenting Zikel's Blessing as a party buff (self only since Jul 8).
- 4Raising Overhead Slam without Rage Burst: on a boss, Overhead Slam only triggers at 7% without it.
- 5Keeping Overhead Slam's drain spec out of habit in PvE: 0.7% since Aug 26; [Upward Strike] brings far more on bosses (DC guide).
- 6Hitting the boss from behind like an Assassin: Experienced Counterstrike grants a Frontal Attack Damage Boost; aim for at least 70–80% frontal hits.
- 7Putting Rage Burst, Zikel's Blessing, Lunge Stance and Lifestealing Blade in the automatic macro on bosses.
- 8Forgetting Rending Blow 16 (+50 MP on crit) and running out of MP, especially in PvP against a Templar or a Cleric.
- 9Spreading Arcana levels over many skills instead of finishing 16/20 on Overhead Slam, Rending Blow and Ruinous.
- 10Spreading stigma shards evenly: Lunge Stance to tier 20 first.
- 11Using Focused Block against a CC (it is Defiance that cleanses); Focused Block is for big damage hits (Chopy).
- 12Relying on Defiance to break out of a Root: it doesn't remove it, and both Leaping Slam and Ruinous Blow are blocked while Rooted since Sep 16 (KR).
- 13Believing that area drains heal off every target: since Jul 22 (KR), a drain only applies to one target.
- 14Raising Keen Strike to 16–20 for bosses: in KR, it is no longer used on bosses once Overhead Slam is permanently active.
- 15Stacking Combat Speed beyond the plateau (~100% buffed in KR).
- 16Engaging with Leaping Slam and Rush Strike in one go, before the opponent has used their escape.
- 17Enhancing gear beyond +5 before 45.
- 18Playing in Action mode without Keen Strike in the macro: out of MP.
- 19Following a Korean guide from before July 2026 for group sizes: Korea played in 4s (8-player raid); since Jul 1, it is 5 and 10 like on Global.
- 20Trusting the tier lists of Kinah-selling sites: some list skills that don't exist (PVPBank, U4GM).
- 21Copying the Korean thresholds (Combat Speed, Smite ≈ 70%, Block 2,900–3,300): they assume Heroic gear and Daevanion boards twice as rich; on Global, aim first for enough Accuracy and a complete set of gear.
- 22Looking for Abyss gear on Global: the Abyss shop sells no gear there; PvP is played with crafted gear (Dragon Lord) and PvP lines.
- 23Playing a Gladiator next to a Templar while counting on your Block buff: the Templar's Fury replaces it, whatever your Experienced Counterstrike level.
来源
每项建议都附有来源与日期。
- NC, note de mise à jour KR du 13/11/2026 (correctifs du Gladiateur)官方2026/11/13官方
- NC, notes de version Global du 11/11/2026 (FR)官方2026/11/11官方
- NC, Patch Notes Global du 11/11/2026 (EN)官方2026/11/11官方
- NC, note de mise à jour KR du 11/11/2026 (refonte du Gladiateur, niveau 55)官方2026/11/11官方
- NC, notes de mise à jour Global du 04/11/2026 (Forge abyssale : Ludra, Reshanta extérieur du chaos, siège)官方2026/11/04官方
- NC, note de mise à jour KR du 04/11/2026官方2026/11/04官方
- NC, notes de mise à jour Global du 28/10/2026 (PV de base, boss, Assassin)官方2026/10/28官方
- NC, note de mise à jour KR du 28/10/2026 (Outland)官方2026/10/28官方
- NC, notes de mise à jour Global du 21/10/2026 (mode Difficile, plateau Ariel, correctifs de classes)官方2026/10/21官方
- NC, note de mise à jour KR du 21/10/2026 (compétences d’assaut, réductions de soins, fin de saison au 11/11)官方2026/10/21官方
- NC, notes de mise à jour Global du 14/10/2026 (correctifs de classes)官方2026/10/14官方
- NC, note de mise à jour KR du 14/10/2026 (rééquilibrage RvR)官方2026/10/14官方
- NC, note de mise à jour KR du 07/10/2026官方2026/10/07官方
- NC (KR) – Note de mise à jour du 30/09/2026 (rien pour le Gladiateur)官方2026/09/30官方
- NC (KR) – Note de mise à jour du 23/09/2026官方2026/09/23官方
- NC (KR) – Note de mise à jour du 16/09/2026官方2026/09/16官方
- NC (KR) – Note de mise à jour du 02/09/2026官方2026/09/02官方
- NC (KR) – Note de mise à jour du 26/08/2026 (modifiée le 22/09)官方2026/08/26官方
- NC (KR) – Note de mise à jour du 19/08/2026官方2026/08/19官方
- NC (KR) – Guidebook officiel « 검성 스킬 » (MAJ 18/08/2026)官方2026/08/18官方
- NC (KR) – Note de mise à jour du 12/08/2026官方2026/08/12官方
- NC (KR) – Note de mise à jour du 29/07/2026 (Dissipation de choc)官方2026/07/29官方
- NC (KR) – Note de mise à jour du 22/07/2026 (drains sur une seule cible)官方2026/07/22官方
- NC (KR) – Note de mise à jour du 15/07/2026 (Lame vampirique, Fracas)官方2026/07/15官方
- NC (KR) – Note de mise à jour du 08/07/2026官方2026/07/08官方
- NC (KR) – Note de mise à jour du 01/07/2026 (Chapitre 1 : groupes de 5, Sanctuaire à 10, refonte de Riposte habile)官方2026/07/01官方
- Aion 2 Maps (global) – guide Gladiateur : build à 45, stigmas, plateaux Daevanion, macro (Coup acéré, ligne de Coup féroce lacérant et Fracas tenus ; MAJ 05/10/2026 d’après Wakayashi, Grobs, Sen, couga54, Arthars, Chef_Zhab, Storyteller, 빵호빵)媒体2026/10/05多方核实
- aion2tool (global) – fiches officielles des meilleurs Gladiateurs du global (top 10 de MetaBot : Kratos, dolphin, iloveMILF, Qingx, Makarov, YnaMocha, touchdew, Amis, PODSE4KA ; stigmas et niveaux de compétences lus le 05/10/2026)媒体2026/10/05多方核实
- aion2tool (KR) – statistiques du Gladiateur : 199 des 200 meilleurs Coréens (stigmas, compétences, passifs, Arcanes ; MAJ 05/10/2026) et fiches des quatre premiers (물빈, 양검, 애증, 재준)媒体2026/10/05多方核实
- AION 2 Meta – Gladiator Build Guide : 8 459 meilleurs Coréens (6 995 réglages JcE et 1 209 JcJ, données du 01/10) et 89 meilleurs Gladiateurs du global (stigmas, compétences, équipement, 04/10)媒体2026/10/04多方核实
- MetaBot.GG (global) – « What top Gladiator players run » : 1 681 Gladiateurs de niveau 45 suivis dans les 5 régions, 151 lus (stigmas, compétences, Daevanion, équipement), budget de 203 points (MAJ 03/10/2026)媒体2026/10/03多方核实
- Aion 2 Maps (global) – arènes et champs de bataille : équipement égalisé en 10v10 seulement, récompenses (MAJ 02/10/2026)媒体2026/10/02多方核实
- Aion 2 Maps (global) – « Ce qui change au global » : stigmas, plafonds, portes d’expédition, équipement, plateaux (MAJ 01/10/2026)媒体2026/10/01多方核实
- Aion 2 Maps (global) – raid Ludra : orbe rouge, plateau, déséquilibre (MAJ 01/10/2026)媒体2026/10/01多方核实
- Aion 2 Maps (global) – parcours de progression : portes d’iLvl 1 400 / 2 100 / 2 800, artisanat des Rois dragons (MAJ 01/10/2026)媒体2026/10/01多方核实
- Grobs (global, YouTube EN) – « The Only Gladiator PVE Guide You Need » (145 k vues ; macro et rotation de montée et de mi-jeu)攻略或创作者2026/09/29多方核实
- Aion 2 Maps (global) – buffs de groupe : Templier ou Gladiateur, pas les deux (MAJ 28/09/2026)媒体2026/09/28多方核实
- Aion 2 Maps (global) – statistiques expliquées et plafonds de CRIT/Précision (MAJ 28/09/2026)媒体2026/09/28多方核实
- GameTOC (KR, presse) – « 아이온2, 버프 방식 바꿔 수검호치 쏠림 완화 »社区2026/09/22多方核实
- AION2 Hub (global) – base d’objets du client global : Sabre d’extermination de Ludra, Cœur de Ludra, Roi dragon sage éclatant (Launch Scale Test, 19/09/2026)媒体2026/09/19多方核实
- AION2 Hub (global) – « Global vs Korea : ce que le Launch Scale Test a changé » (d’après Madsin, 17/09/2026 ; MAJ 18/09)媒体2026/09/18多方核实
- aLuckyRO (global, YouTube EN) – « AION 2 Gladiator Guide For Skills & Stigmas | Daevanion & Macros Setup »攻略或创作者2026/09/08多方核实
- Inven 검성 (KR) – 빵호빵 (consultant) « 올려치기 100타 ++ 검성의 모든걸 담았습니다 » (retour du « 내절캔 »)攻略或创作者2026/09/05多方核实
- Inven 검성 (KR) – 쿵치키쾅치키 « 검성 매크로 세팅 » (60 k vues, MAJ 26/08)攻略或创作者2026/08/26多方核实
- Inven 검성 (KR) – 쿵치키쾅치키 « 내절 복귀로 인한 매크로 설정 업데이트 »攻略或创作者2026/08/26多方核实
- Inven 검성 (KR) – 쿵치키쾅치키 « 8월12일 대격변 후 마매 세팅 »攻略或创作者2026/08/12多方核实
- Sen (TW, YouTube EN) – « Aion 2 Gladiator FULL Guide – Everything You Need Before Global Launch »攻略或创作者2026/07/30多方核实
- Inven 검성 (KR) – 뒷골목제이엠 « [챕터1] 검성 변경점과 추천 셋팅법 » (42 k vues)攻略或创作者2026/07/02多方核实
- 쵸튜브[쵸피] / Chopy (KR) – « 패치후 변경된 최신 아르카나 셋팅법 » (YouTube)攻略或创作者2026/06/30多方核实
- DC Inside (KR) – 뇌절도 « 검성 PVE 가이드라인 » (29 k vues, MAJ 04/05/2026, commentaires jusqu'en septembre)攻略或创作者2026/05/04多方核实
- 쵸튜브[쵸피] / Chopy (KR) – créateur Gladiateur (vidéos résumées par Vortex Gaming)攻略或创作者2025/12/19多方核实
- Inven 검성 (KR) – « 검성 난무 스킬 위치 » (05/10 : place de Lame déferlante dans la ligne, réglage « sous Coup féroce lacérant » défendu)社区2026/10/05单一来源
- Inven 검성 (KR) – « 칼날 날리기 VS 흡혈의 검 » (05/10 : Lancer de lame jugé inutile en JcE)社区2026/10/05单一来源
- Inven 검성 (KR) – « 진지하게 얘기해준다 자막검성 » et réponses (blocage naturel : utile surtout à l’Épreuve 16 et au Cauchemar ; avec un Templier, Persévérance ou Frappe d’assaut pour le DPS)社区2026/10/04单一来源
- Inven 검성 (KR) – « 원정 데우스 막기 타이밍(노련한반격 활성화) » (Blocage sous Armure d’onde : Riposte habile ×1,5 ; timing des blocages par boss)社区2026/10/04单一来源
- Inven 검성 (KR) – « 액티브 아르카나 20필수 16필수좀 알려주세요 » (Fracas, Coup féroce lacérant et anéantissant à 20, Coup acéré et Lame déferlante à 16 : « rien n’a changé »)社区2026/10/04单一来源
- aion2tool (global) – statistiques du Gladiateur : 101 meilleurs personnages du global, niveaux de compétences, de passifs et de stigmas (MAJ 04/10/2026)媒体2026/10/04单一来源
- MetaBot.GG (global) – « AION 2 Gear Progression Guide: Item Level and Best Gear » (Saison 1 globale ; consulté le 04/10/2026)媒体2026/10/04单一来源
- couga54 (global, GitHub Pages) – AION 2 Guides : Gladiateur, macro à trois lignes et macro de montée d’après Grobs (MAJ 04/10/2026)攻略或创作者2026/10/04单一来源
- Inven 검성 (KR) – « 자연막기 3개월차 내돈내산 후기 » (2 200–2 400 de Blocage suffisent à sentir l’effet ; Blocage ciblé gardé pour les coups obligatoires)社区2026/10/03单一来源
- Inven 검성 (KR) – « 고수님들 뉴비 검성 하나 살려주세요 » (réponses : 4 Châtiment + 4 Gardien + 2 Indomptable, Fracas, Coup féroce lacérant et anéantissant 20, Lame déferlante 16, Riposte habile 34+, Rupture meurtrière 30+)社区2026/10/03单一来源
- Game8 (global) – Rending Blow Gladiator Build : stigmas, macro, passifs, titres et ailes (MAJ 03/10/2026)媒体2026/10/03单一来源
- aLuckyRO (global, YouTube EN) – « AION 2 Latest Gladiator PVE Build for Global » (31 k vues)攻略或创作者2026/10/03单一来源
- Inven 검성 (KR) – « 검성 인게임매크로만 쓰려면 어떻게 세팅해야 하나요? »社区2026/10/02单一来源
- Sen (global, YouTube EN) – « AION 2 Progression Guide – EVERYTHING You Need To Know (+ Gladiator guide) »攻略或创作者2026/10/02单一来源
- Inven 검성 (KR) – « 지금까지 타수가 제일 잘 나왔던 마매 » (une seule compétence par ligne de macro)社区2026/10/01单一来源
- Inven 검성 (KR) – « 최고공속 도달, 타수 테스트 해봄 » (VIT de combat et nombre de coups)社区2026/10/01单一来源
- Inven 검성 (KR) – « 뉴비 검성 한달 입문기 » (conseils : Coup féroce lacérant et Fracas 20, passifs Riposte > Rupture > Choc > Préparation)社区2026/10/01单一来源
- Inven 검성 (KR) – « 자막세팅의 핵심은 » (32 commentaires : seuils de Blocage, plafond 80 %)社区2026/10/01单一来源
- Inven 검성 (KR) – « 자연막기 검성이 할수 있는 것 » (Blocage ~2 930 en ville)社区2026/10/01单一来源
- Reddit r/aion2 (global) – « Need help with Gladiator!! » (réponse : macro Fracas → Coup féroce lacérant, Explosion de fureur dès Fracas 16)社区2026/10/01单一来源
- Reddit r/aion2 (global) – « Do I need to tank if I play gladiator? »社区2026/10/01单一来源
- Game8 (global) – List of All Parchment Arcana : sets Vigueur primordiale et Armure magique (MAJ 30/09/2026)媒体2026/09/30单一来源
- Game8 (global) – Stigma Guide : emplacements aux niveaux 22, 27, 32 et 37 (MAJ 30/09/2026)媒体2026/09/30单一来源
- AION2 Hub (global) – traductions EN des notes KR (juillet–septembre 2026)社区2026/09/30单一来源
- Inven 검성 (KR) – « 형들 패시브 선택장애 질문점.. » (Riposte habile n° 1)社区2026/09/30单一来源
- Inven 검성 (KR) – « 수호 검성 시너지 정밀분석 » (Extorsion ~3 % contre Provocation ~11 %)社区2026/09/30单一来源
- Inven 검성 (KR) – « 불신 검성 전 직업 1위 » (classements NDPS, 64 commentaires)社区2026/09/30单一来源
- Inven 검성 (KR) – « 시련16깬 검성입장에서… » (Templier préféré en contenu à 5)社区2026/09/30单一来源
- Inven 검성 (KR) – « 자연막기 하면 딜 오르는거 맞는데 아님 » (blocage naturel)社区2026/09/30单一来源
- Inven 검성 (KR) – « 검성 자연막기는 불안한거 아닌가? » (taux d'échec du Blocage)社区2026/09/30单一来源
- Failure Guild (global) – « Aion 2 Level 1-45 Ultimate Speedrun Guide » (PDF du projet)社区2026/09/29单一来源
- Reddit r/aion2 (global) – « Will it be easy to find a party with a gladiator? » (joueur TW 600 h)社区2026/09/29单一来源
- Wakayashi (global, DE) – « Aion 2 Gladiator PvE Guide: Rotation, Skills & Makro » (texte de la vidéo : Fracas spé « sans recharge », Position de charge 20, Zikel avec Templier, Blocage ciblé sans)攻略或创作者2026/09/29单一来源
- Inven 검성 (KR) – « 검성 pvp 스킬 특화 셋팅 질문 » (réponse détaillée)社区2026/09/28单一来源
- Inven 검성 (KR) – « pvp는 고점 세팅 그딴거 없음 » (base PvP : Position de survie, RÉS, Volonté de survie)社区2026/09/28单一来源
- Reddit r/aion2 (global) – « Gladiator Tank or Dps ? » (Templier tank, Gladiateur hybride)社区2026/09/28单一来源
- Inven 검성 (KR) – « Pve와 pvp 깔개 분석 » (rôle d'Explosion de fureur en PvP)社区2026/09/27单一来源
- Inven 검성 (KR) – « 때쟁때 검성이 할수있는게 뭐냐고? » (guerre de masse)社区2026/09/27单一来源
- Reddit r/aion2 (global) – « Gladiator worth playing if your group already has a Templar? » (compo KR/TW, préréglages)社区2026/09/25单一来源
- MMO Codex (global) – Aion 2 Gladiator Build (cite aLuckyRO, xMontu, Storyteller, Sen, Chopy ; MAJ 21/09)社区2026/09/21单一来源
- AION2 Hub (global) – fiche Gladiateur : compétences du client global (Launch Scale Test, 19/09/2026)媒体2026/09/19单一来源
- Inven 검성 (KR) – « 행님들 파맹 특화 4,5는 고정인거죠? » (Coup féroce anéantissant)社区2026/09/18单一来源
- Inven 검성 (KR) – joueur classé 980 k « 검성소신발언 »社区2026/09/16单一来源
- Inven 검성 (KR) – « 검성은 어비스때쟁에서 젤 개병신캐릭터임 » (guerre de masse)社区2026/09/16单一来源
- Inven 검성 (KR) – « pvp 25랩 스티그마 멀로쓰나요? » (commentaires)社区2026/09/10单一来源
- Inven 검성 (KR) – « PVP 스티그마 요즘 뭐씀?? » (commentaires)社区2026/09/09单一来源
- Inven 검성 (KR) – « PVP 절명20 » (43 commentaires : PM en PvP)社区2026/09/08单一来源
- Inven 검성 (KR) – « 형들 pvp 20랩스킬 특화좀 질문드려요 » (spés PvP)社区2026/09/08单一来源
- Inven 검성 (KR) – « 원버튼 인겜 스킬매크로 세팅 (2) » (macro intégrée seule)社区2026/09/06单一来源
- Vortex Gaming (KR) – résumé « 검성 100타 이상 고점 세팅 » (vidéo 빵호빵)社区2026/09/05单一来源
- Inven 검성 (KR) – « 파맹 특화 뭐찍어? 치명30%? 속도20? » (plafond de CRIT)社区2026/09/04单一来源
- Inven 검성 (KR) – « 수호한테 따이는 검성 인증 » (DPS Templier contre Gladiateur)社区2026/09/04单一来源
- Inven 검성 (KR) – « 이제 예리 아에 안써요? » (Coup acéré réservé aux packs)社区2026/09/02单一来源
- CoGM (global) – Aion 2 skills (spécialisations et stigmas)社区2026/09/01单一来源
- Inven 검성 (KR) – « 파맹다들 특화 몇번사용중이신가요? »社区2026/08/30单一来源
- Inven 검성 (KR) – « 도약찍기에 특화 뭐 쓰세요? » (donjon 1/4, farm 3/5)社区2026/08/30单一来源
- Inven 검성 (KR) – « 검성 전투속도별 타수 비교 » (test 1 min, 3 essais par palier)社区2026/08/28单一来源
- Inven 검성 (KR) – « 형들 pvp절단(절맹) 질문좀요 » (PM en PvP)社区2026/08/27单一来源
- Inven 검성 (KR) – « [8/30일] 마우스매크로 내절캔 세팅 » (20 k vues : boucle 내절캔, blocage et buffs à la main en donjon)社区2026/08/27单一来源
- Inven 검성 (KR) – « Pvp에서 내찍 1번특화 드는거엿음?? » (Fracas en PvP)社区2026/08/25单一来源
- Inven 검성 (KR) – « 검성은 최고점 이후 12% 너프된 상태 »社区2026/08/23单一来源
- Inven 검성 (KR) – « 형들 내찍 특화 뭐씀?? » (Fracas 3/4/5 en PvE)社区2026/08/20单一来源
- Inven 검성 (KR) – 마라탕 « 예리/검난/파맹 20레벨 필수일까? » (analyse, 37 commentaires)社区2026/08/19单一来源
- Gamers Together (global) – AION 2 Gladiator: Build, Skills and Stats (relaie des classements commerciaux)社区2026/08/09单一来源
- Inven 검성 (KR) – « '피흡 단일대상 적용' 이게 제일 크리티컬함 » (drains sur une cible)社区2026/07/22单一来源
- Inven 검성 (KR) – « 검성 PVE 인던 고점 아르카나 공략 » (20 k vues)社区2026/07/20单一来源
- Inven 검성 (KR) – « 검성 스티그마 분석글 »社区2026/07/01单一来源
- Inven 검성 (KR) – « 검성 PVE 실전딜 가이드 »社区2026/05/11单一来源
- Inven 검성 (KR) – « 시즌 오픈부터 지금까지 검성만 한 저만의 세팅 » (sous-tank, Blocage)社区2026/04/17单一来源
- Inven PvP (KR) – « 개인적인 직업별 PVP, PVE 성능 » (auteur Gladiateur)社区2026/03/03单一来源
- cvmaxlimbo (KR, blog) – « 아이온2 검성 PVE 추천 스킬트리및 공략 총정리 » (Saison 1)社区2026/02/08单一来源
- Inven 치유성 (KR) – guide (système Arcana et niveaux de compétence, commun à toutes les classes)社区2026/01/28单一来源
- Inven (KR) – guides du Sanctuaire de Ludra (Nirr, 19/01/2026, et autres ; écrits pour 8 joueurs)社区2026/01/19单一来源
- Bahamut (TW) – « 劍星 培養攻略 從入坑到入土 » (MAJ 07/01/2026)社区2026/01/07单一来源
- Vortex Gaming (KR) – résumé « 검성 스킬 가이드 (12/07) » (vidéo Chopy)社区2025/12/07单一来源
- Inven 검성 (KR) – « 패치 전후 DPS » (DPS sur mannequin avant le 11/11, après le 11/11 et après le 13/11)社区2026/11/13推断
- Inven 검성 (KR) – « 패치후 검성 1분허수 » (DPS sur mannequin avant et après le 11/11)社区2026/11/11推断
- Inven 검성 (KR) – « 글섭에서 검성시작하려는데 마매질문 » (05/10 : sur le global, macro intégrée)社区2026/10/05推断
- MetaBot.GG (global) – « AION 2 Builds: Best Build for Every Class at Launch » : sélection Gladiateur d’après les données du client (consulté le 04/10/2026)商业网站2026/10/04推断
- Aion2 Codex (global) – Gladiator Build (PvE), d'après un guide vidéo de créateur pour le client global (MAJ 02/10/2026)媒体2026/10/02推断
- Sportskeeda (global) – Aion 2 Gladiator build : stigmas de début de jeu, priorité de montée des stigmas, macro (01/10/2026)媒体2026/10/01推断
- ExpCarry (global, site de boost) – AION 2 Gladiator Builds: PvE, PvP & Macros商业网站2026/09/28推断
- aion2.fr (FR) – build Gladiateur (fansite, incohérent)社区2026/09/15推断
为你的角色量身打造的攻略
关联你的游戏角色:Aion2 Guide 会读取其官方角色资料,挑选适合你玩法的配装,并告诉你该优先改善什么。